You cut a design you loved, peeled the first corner of waste, and watched the tail of a letter lift away with it. Or the whisker snapped. Or a tiny counter inside a paw print stayed stuck to the waste sheet and left a blob where a hole should be.
Weeding is where most vinyl projects actually fail, and the frustrating part is that by then the cut is done. You cannot undo a torn stroke. You can only cut it again and hope.
The good news is that almost every tear traces back to something decidable before the mat ever loads: how the design is drawn, and how big you cut it. Technique matters, and we will get to the order and the reverse-weeding trick, but the design side is where the real wins are.
Tip
Start with a test cut. Weed slowly and change peel direction as the shapes require. On tiny designs, remove interior waste while the surrounding sheet still supports the letters. Try reverse weeding on suitable adhesive vinyl when small pieces keep lifting, and enlarge or simplify geometry that your material cannot hold.
What weeding actually is, in file terms
This is worth getting precise about, because it explains every tear you have ever had.
A cut file is a set of closed paths. The machine drags a blade along every one of them, through the vinyl while leaving its liner intact. Cricut calls this a kiss cut. When it finishes, the sheet is not "a design plus waste". It is a mosaic of separate islands, each one held down by nothing but its own adhesive.
Weeding is the act of removing the islands you do not want. A big island of waste comes away in one satisfying sheet because it has enough material to hold together while you pull. A skinny island has almost nothing holding it together, so the force you apply travels through a cross-section a fraction of a millimetre wide, and it snaps.
That is the whole physics of it. Everything below is a consequence.
Why thin strokes tear
Vinyl film has a tensile strength. Pull hard enough on a strip and it breaks. Halve the width of the strip and you roughly halve the force it can take before breaking.
Now consider what happens when you weed. You are not lifting the waste straight up in perfect uniform tension. You are peeling, which concentrates almost all the force along a narrow moving line, and you are doing it by hand at whatever angle feels natural. A 6 mm strip of waste absorbs that happily. A 0.8 mm strip does not.
Three specific geometries cause most of the trouble:
Long thin positive strokes. The descender of a script letter, a bird's leg, a whisker, the antenna on a bug. These are part of the design, so when they lift with the waste you have lost the piece.
Long thin negative strips. The gap between two closely spaced letters, the space between the fingers of a hand, the sliver between a dog's ear and its head. These are waste, but they are waste that tears into six pieces instead of coming out whole, and each fragment has to be picked out individually.
Sharp interior corners. A sharp inside corner is a stress concentrator. When you pull, the tear starts at the point of the corner and runs into the design. A design drawn with slightly rounded interior corners resists this in a way that a design drawn with knife-sharp points does not.
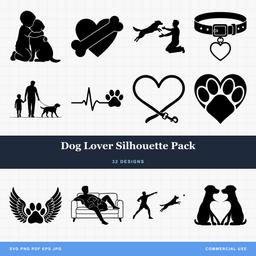 Dog Lover Silhouette Pack32 designs, commercial license included$3.99
How size interacts with everything
Here is the part people underestimate. When you scale a design down, every dimension in it scales down together. Scaling a design to 50% does not just make it smaller. It halves every stroke, halves every gap, and halves the amount of material holding each island together.
A design whose thinnest stroke is a comfortable 3 mm at 8 inches wide has a 1.5 mm stroke at 4 inches and a 0.75 mm stroke at 2 inches. The narrower versions give you less handling margin. Whether they weed cleanly depends on the film, cut quality and shape, so test the smallest version rather than treating a width as a guaranteed pass or failure.
This is why the same file can be a joy on a car window and a nightmare on a phone case. Nothing about the file changed. The stroke width did.
Instead of a universal pass/fail width table, compare the same difficult area at two or three sizes on a scrap. Record which version weeds without stretching or losing wanted pieces. HTV is not always thicker or harder to weed than adhesive vinyl: Siser EasyWeed, for example, is a thin film with a pressure-sensitive carrier intended to support detailed designs.
The practical move is to measure before you cut. In Design Space, Silhouette Studio, or Inkscape, zoom into the narrowest part of the design at the size you plan to cut, and check it against a ruler on screen or against the object dimensions. Thirty seconds there saves a ruined sheet. Our guide to resizing SVG files without losing quality covers the mechanics of scaling cleanly.
What makes a design weed-friendly before you load the mat
This is the part we can speak to directly, because drawing cut files is what we do. Weeding difficulty is baked into a design long before it reaches your machine, and you can read it off the artwork.
Look for closed, chunky shapes. A filled silhouette weeds beautifully because it is one big island surrounded by one big waste sheet. Two pulls and you are done. This is why silhouette-style packs are the friendliest possible introduction to vinyl and why we keep drawing them.
Count small pieces and enclosed waste areas. Many positive pieces may share one surrounding waste sheet, so their count does not equal the number of pulls. Still, tiny islands and counters give you more places to inspect and more opportunities to lift a wanted piece.
Check for internal counters. Counters are the enclosed holes: the middle of an O, the eye in an animal head, the gap in the loop of a lowercase e. Every counter is a tiny waste island that must be picked out individually. A design with forty counters is a forty-poke job even if everything else about it is bold.
Watch for hairline gaps between adjacent shapes. When two elements sit almost touching, the sliver of waste between them is the first thing to tear. On a well-drawn file those elements are either merged into one shape or separated by a gap wide enough to weed.
Prefer designs drawn for cutting over designs converted from images. An auto-traced photo produces jagged, node-heavy paths with unpredictable thin spots and stray specks the size of a full stop. Those specks are all individual weeding jobs, and the thin spots are where the tears start.
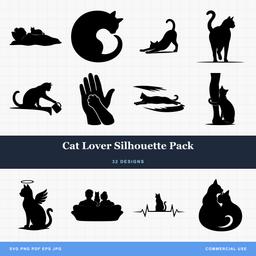 Cat Lover Silhouette Pack32 designs, commercial license included$3.99
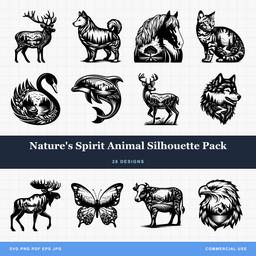 Natures Spirit Animal Silhouette Pack28 designs, commercial license included$3.99
Get the cut right first
You cannot weed your way out of a bad cut. Two failure modes look exactly like a weeding problem but are not.
Under-cutting. If the blade did not fully sever the film, the design and the waste are still connected, and pulling the waste drags the design with it. The tell is that the tear happens everywhere rather than at thin spots. Fix the pressure or the blade before you touch the sheet again.
Over-cutting. If the blade went well into the backing paper, the design pieces have nothing solid under them and lift with the waste. Inspect the liner for deep scoring or cuts. It should remain intact; lifting alone does not prove over-cutting. Reduce pressure.
The other quiet culprit is a worn blade. A dull blade tears the film instead of slicing it, leaving ragged edges that catch and lift while you weed. If your cuts have gone gradually worse over months, and cleaning the blade housing of vinyl scraps did not help, replace it before you blame the file.
Do a test cut on a scrap corner. It costs an inch of vinyl and tells you in ten seconds whether the whole sheet is going to behave. If vinyl is new to you, our first vinyl cutting project guide walks through mat, blade, and material setup from the start.
The weeding order that works
For a bold design, the following outside-first sequence can work well. For tiny lettering, Cricut recommends removing internal waste first, while the surrounding vinyl helps hold the shapes in place. Choose the order that supports your particular geometry.
-
Trim the sheet close to the design. Cut away the excess vinyl around the cut area with scissors first. Less sheet means less weight and less flapping, and flapping is what snags fine details.
-
Lift a starting corner. Use the weeding hook to lift one corner of the outer waste. Starting at a corner gives you a controlled peel front instead of a random tear.
-
Remove the outer waste in manageable sections. Peel it back on itself, low and flat against the backing, at as shallow an angle as you can manage. Change direction to follow delicate cuts rather than pulling against them. Go slowly through any area where a thin element approaches the edge of the waste.
-
Remove the long connecting strips. The strips between letters or between separated shapes come next. If one starts to tear, stop and restart the pull from the other end rather than fighting it.
-
Do the small islands. The floating pieces that are waste but not attached to anything: the gaps between overlapping elements, the space inside a curled tail.
-
Check every counter. Remove any enclosed waste you have not already weeded. Small lettering may be easier with these removed first.
-
Check with raking light. Hold the sheet at a low angle under a lamp. Leftover counters and specks throw shadows and become obvious in a way they never are looking straight down. This one habit catches more misses than anything else.
A weeding mat or light box helps a great deal here, because backlighting makes the cut lines visible through the vinyl and you can see exactly which pieces are waste before you pull anything.
Reverse weeding, and when it earns its keep
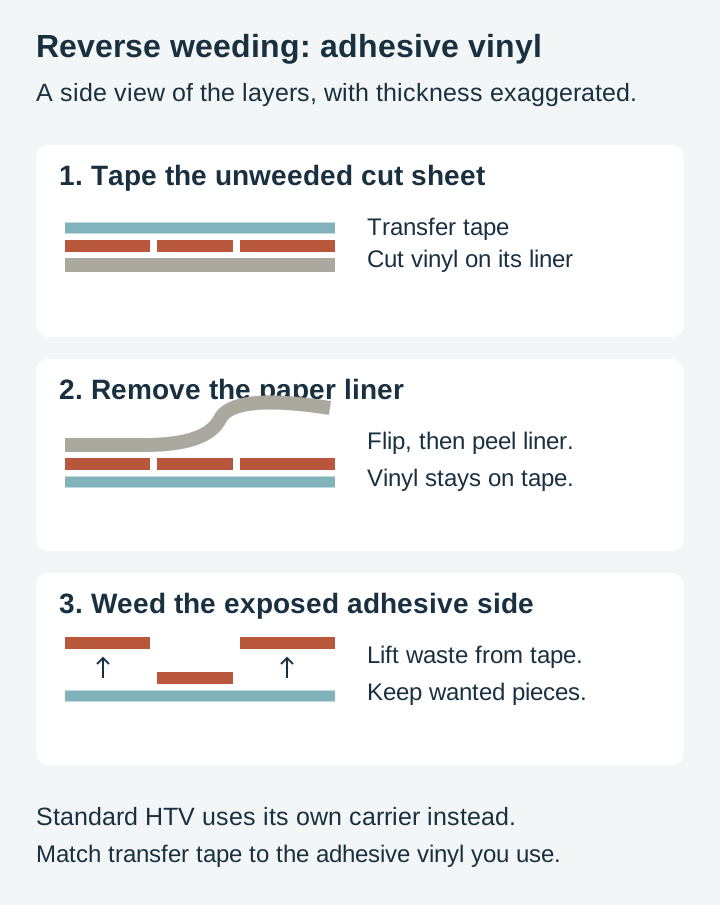
Reverse weeding flips the order: transfer tape goes on first, waste comes off second.
Transfer tape supports the front faces of the cut pieces while you work from the adhesive side. That support can help preserve spacing, although pieces can still lift or stretch if the cut or tape tack is unsuitable.
The process:
- Weed nothing yet. Leave the sheet exactly as it came off the machine.
- Apply transfer tape over the entire cut area. Squeegee it down firmly. Firm pressure is what makes the tape grip the design harder than the backing does.
- Flip the sheet over. You are now looking at the back of the backing paper.
- Peel the backing paper away from the vinyl, not the vinyl away from the backing. Keep it low and flat, working from a corner.
- Weed from the exposed adhesive side. The cut vinyl, including waste, is now held on the transfer tape. Lift unwanted vinyl with a hook or tweezers; do not expect the liner to separate design from waste automatically.
- Remove the counters and check the layout. Keep fingers off the exposed design adhesive where possible.
- Apply as normal.
This transfer-tape method is for suitable adhesive vinyl. Ordinary HTV is weeded on its existing carrier; do not add ordinary adhesive-vinyl transfer tape to an HTV pressing workflow. Specialty printable or patterned heat-transfer products may require their own specified mask. A single bold silhouette is often quicker to weed normally.
The one thing to watch is tape tack. Very high-tack transfer tape can grip a delicate design so hard that it does not release onto the final surface. If a design is fine and detailed, use a medium-tack tape and burnish the application thoroughly.
When something tears anyway
It happens. A few rescues that are worth trying before you recut.
A piece lifted but is still attached. Lay it back down with the hook and burnish it flat through the backing paper. If it is a design element and the adhesive still holds, it will usually settle.
A piece came away entirely. If it is a discrete shape rather than a thin stroke, you can often place it back with tweezers once the transfer tape is on, using the outline in the tape as your guide. Fiddly, but faster than recutting.
A thin stroke snapped mid-length. This one is usually terminal on adhesive vinyl. A separate HTV patch may leave a visible seam; recutting is usually cleaner. Do not assume pressing will blend the break.
The whole design is fighting you. Stop. Recut it 20% larger, or pick a bolder version of the same subject. That is not defeat, it is the correct read of the situation. Twenty minutes fighting a design that is too small for its own strokes always costs more than one more sheet of vinyl.
Choosing designs by project size
The single most useful habit is matching design complexity to the finished dimensions before you commit.
| Project | Typical size | What weeds well |
|---|---|---|
| Tumbler or mug wrap | 3 to 5 in | Bold silhouettes, short single-word text |
| T-shirt front | 9 to 11 in | Broader space for detail; test fine strokes |
| Car window decal | 4 to 8 in | Solid shapes, chunky lettering |
| Laptop lid | 5 to 8 in | Silhouettes and simple layered designs |
| Phone case | 2 to 3 in | Simple shapes with tested details |
| Front door or window sign | 12 in and up | Fine detail, script, multi-element scenes |
Solid silhouette designs sit at the friendly end of every row in that table, which is why they are the ones to reach for when a project is small or a deadline is close. Sayings packs work the same way when the lettering is drawn with weight rather than as thin script.
If you are stacking colours on top of each other, weeding order interacts with layer order too, and our guide to layered SVG designs covers registering the layers so the extra weeding is not wasted.
Start with designs that want to be weeded
Every pack on PrintCutCarve is $3.99 and ships as SVG, PNG, JPG, PDF, and EPS, with a commercial license included at no extra cost. There is no unit cap on physical products you make and sell, and print-on-demand platforms are allowed as well. The main restriction is on reselling or sharing the digital file itself; the license page has the full terms.
For the least stressful possible weeding session, start with the solid-shape packs listed below, or browse the full dog and cat collections. They are drawn as closed filled shapes with generous interior spacing, which is exactly the geometry that comes off the backing in one clean sheet.
Designs for this project
Dog Lover Silhouette Pack32 designs, commercial license included$3.99Cat Lover Silhouette Pack32 designs, commercial license included$3.99Natures Spirit Animal Silhouette Pack28 designs, commercial license included$3.99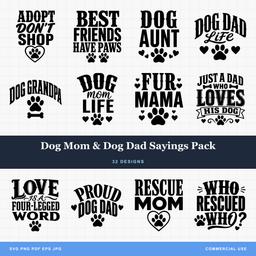 Dog Mom & Dog Dad Sayings Pack32 designs, commercial license included$3.99
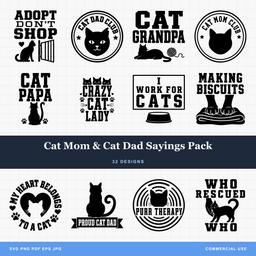 Cat Mom & Cat Dad Sayings Pack32 designs, commercial license included$3.99
Frequently Asked Questions
Why does my vinyl keep tearing when I weed it?
Thin geometry, incomplete cuts, a dirty or worn blade, and peel direction can all cause tearing. Test the cut first, peel slowly in short sections, and try a larger or bolder design when fragile elements still lift. There is no universal minimum stroke width.
What is reverse weeding?
For adhesive vinyl, apply suitable transfer tape before weeding, remove the paper liner, then remove unwanted vinyl from the exposed adhesive side while the tape supports the design. It can help with small pieces, but tape tack and handling still matter. Ordinary HTV already has its own carrier and uses a different process.
What is the smallest vinyl detail that will weed reliably?
There is no reliable minimum across all vinyls. Film type, carrier, adhesive, blade condition, cut settings and geometry all matter. Measure the narrowest strokes and gaps at finished size, then test that difficult area on your actual material.
Does warming the vinyl help with weeding?
Gentle warmth makes vinyl more pliable and the adhesive a little more willing to release, which is why a mildly warm room weeds better than a cold garage. It is not a fix for a design cut too small or a blunt blade, and direct heat on adhesive vinyl can leave the film stretched, so treat it as a small comfort rather than a technique.
Can I sell projects made from your designs?
Yes. Every pack is $3.99 and includes a commercial license with no unit cap, so you can cut and sell as many physical items as you like. Print-on-demand platforms such as Redbubble, Printful, and Amazon Merch on Demand are permitted too. The only thing you cannot do is resell or redistribute the digital file itself.