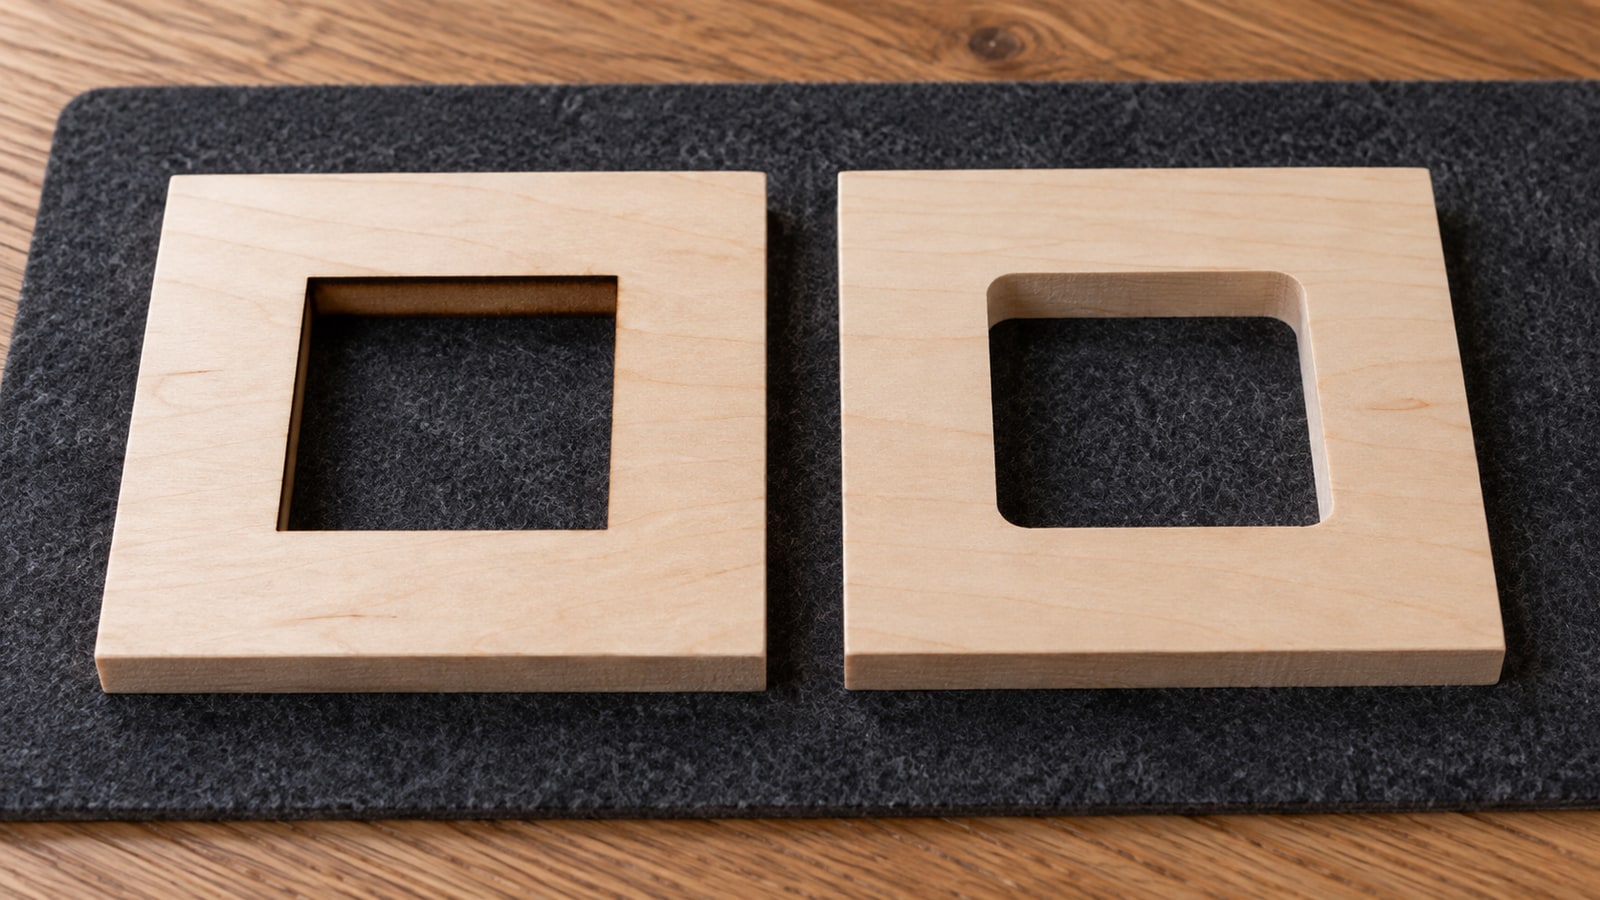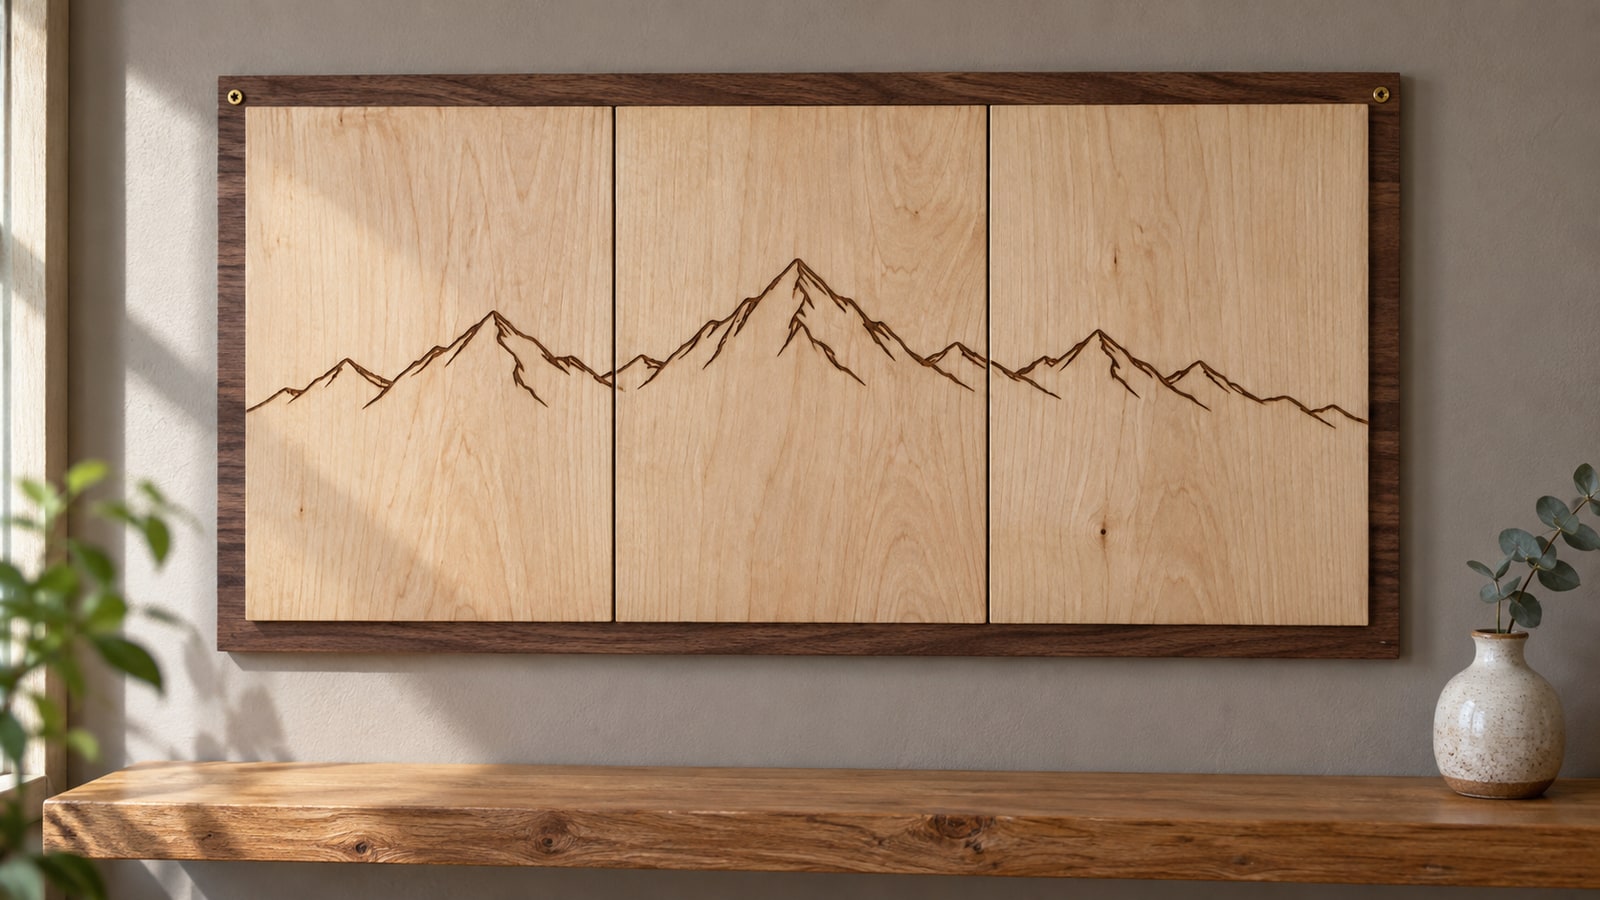
The design is a metre wide. Your bed is forty centimetres. Some machines have a pass-through slot or a tiling workflow that feeds a long piece through in stages, and if yours does that is the easier route. If it does not, the design has to come apart.
Splitting a design across sheets is routine work, and it is one of those jobs where the difficulty is entirely in the planning rather than the cutting. Decide where the seams go and how the pieces will meet, and the rest is straightforward.
Tip
Short answer: put the seams along lines the design already contains, align the pieces mechanically rather than by eye, and account for uncompensated kerf and any planned gaps. Number the pieces before you cut, because they all look the same on the bench.
Decide where the seams go first
This is the decision that determines whether the finished piece looks made or looks joined, and it happens in the file long before anything is cut.
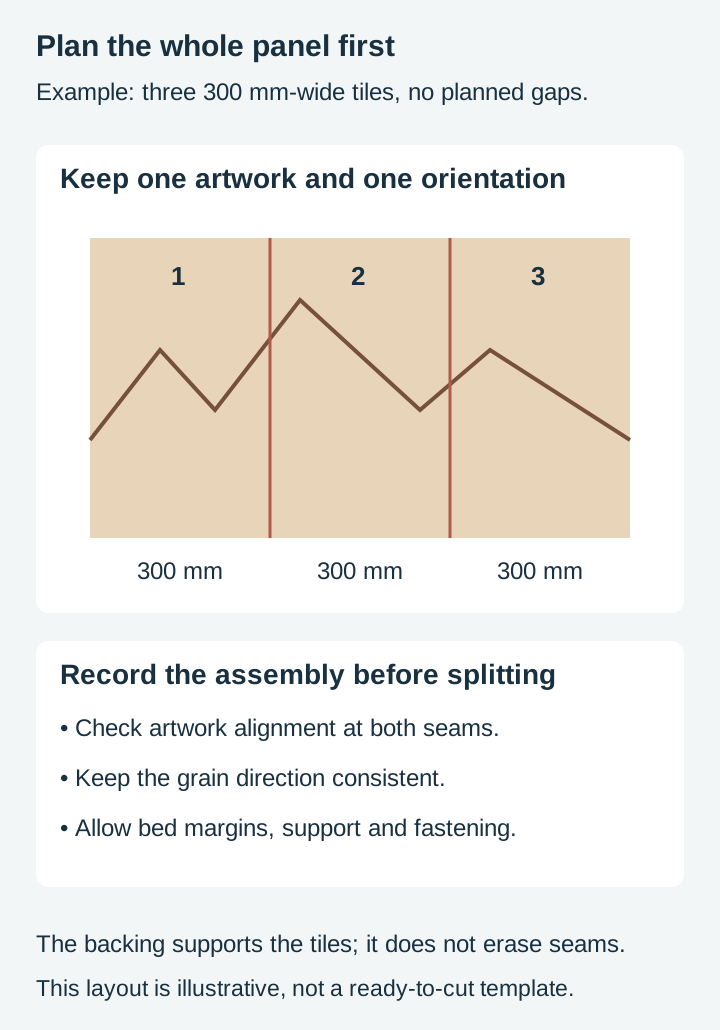
Follow something the design already has. A straight edge in the artwork, the boundary between two areas of tone, the edge of a shape, the horizon in a landscape. A seam that runs along a line the eye expects to be there stops registering as a join.
Avoid open areas. A seam crossing a plain unmarked expanse is exactly where a hairline gap shows, because there is nothing else there to look at.
Avoid fine detail. A seam through the middle of intricate work means the detail has to line up perfectly across the join, and any misalignment is doubled by the pattern either side of it.
Think about the piece, not the sheet. It is tempting to divide by bed size and let the seams fall where they fall. Better to choose the seams first, then check each resulting piece fits.
Three ways the pieces can meet
Different jobs want different joins.
Butt them edge to edge. The pieces sit against each other on a wall or a backing board, with a thin seam visible between them. Simplest, and it works well when the seam follows a design line. This is what the three-board panel approach is.
Mount on a backing board. Cut the pieces, mount them all onto a single sheet behind. The backing holds alignment, hides any small gap as a deliberate channel, and gives the piece a frame. This is the same trick that solves detached islands in our state designs post, and it is the most forgiving option.
Interlock them. Cut mating tabs and slots so the pieces physically join. This can help locate the pieces, but strength depends on the geometry, material and fastening. The fit must account for the cutting process on both halves. Our offset and inset post covers making the clearance work.
For suitable adhesive vinyl, one option is to overlap the pieces slightly along the seam. The material is thin enough that the step is not obvious from a normal viewing distance, though the doubled thickness usually reads as a faint line close up, so put the overlap somewhere the design already has an edge.
Aligning the pieces
By hand and by eye is not accurate enough over any real distance. Give yourself a physical reference.
Dowels or biscuits between the boards locate the pieces mechanically. Dowels fix the position in both directions; biscuits are designed with some sliding tolerance along the seam, which helps with alignment but means you still want a reference edge and clamps while it sets.
A backing board does the same job by being the reference itself: mount the first piece, then position each subsequent one against it.
Registration marks engraved outside the finished area work for lighter pieces, though they have the same limitation as anywhere else: two marks give you position and rotation, one gives you position only. Our two-sided setup post covers that in more detail.
A rebate or lap along the joining edges lets the pieces locate against each other, which suits thicker stock.
Kerf accumulates
The one that surprises people, and it is arithmetic.
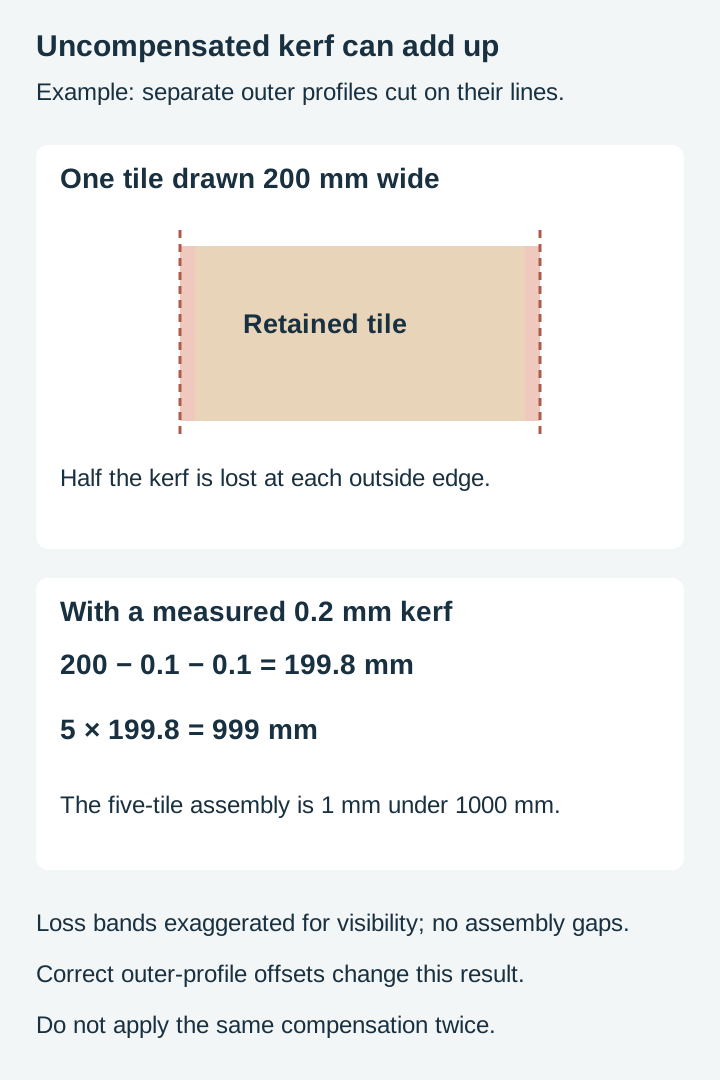
An outer profile cut on its drawn centerline without compensation loses half the cut width at each edge. A rectangular tile therefore loses one full kerf across its width. Five separate tiles lose five kerfs in total. For example, five 200 mm tiles with a 0.2 mm effective kerf assemble to 999 mm instead of 1000 mm when butted with no gaps.
That example does not describe a correctly compensated outer profile, an inside cut, or every shared-edge strategy. Use your actual toolpath and measured cut width.
Whether that matters depends entirely on the piece. A decorative wall panel that is a couple of millimetres under is fine. The same panel fitted into a frame, or built to a specific opening, is not.
If it matters, apply the required allowance in the geometry or toolpath, without applying it twice, and cut a two-tile test before committing a full sheet. Our kerf post covers the underlying idea.
Grain, and why tiles are not interchangeable
Specific to wood, and easy to forget.
Boards cut from different parts of a sheet have different grain, and butting two pieces with obviously mismatched grain together draws the eye straight to the seam even when the alignment is perfect.
Two things help. Cut adjacent tiles from adjacent areas of the same sheet, to preserve the grain relationship as closely as practical. The material removed at the seam still interrupts exact continuity. And orient every tile the same way, which sounds obvious and is easy to get wrong once the pieces are off the machine and rotated on a bench.
Number the pieces
The unglamorous step that saves the most frustration.
Five tiles of similar size, all the same material, all with parts of the same design on them, look remarkably alike on a workbench. Engrave a small number on the back of each, or on the waste area, and record which goes where.
Do it in the file rather than afterwards, so the numbering is part of the cut rather than something you have to remember to add.
The workflow
- Choose the seams based on the artwork, not the bed size.
- Check each piece fits your working area with margin to spare.
- Decide the join before splitting: butt, backing board, or interlock.
- Split the correct geometry. Inkscape Division can divide a filled path with a crossing path. Engraved open lines need trimming at each tile boundary; they are not all handled by the same filled-shape operation. Inspect the imported toolpaths for duplicates or missing segments.
- Add the join geometry if you are interlocking, and the clearance with it.
- Number every piece on a face that will not show.
- Cut a test of one seam, two small tiles, before committing full sheets.
- Cut adjacent tiles from adjacent material and keep their orientation recorded.
Step seven is the one worth not skipping. A two-tile test costs an offcut and tells you whether the join, the alignment and the kerf allowance all work together, which is not something you can check in the file.
When not to split
Worth considering, because splitting is not always the right answer.
Redesign to fit. Sometimes a design can simply be smaller, or reproportioned, and that is less work than a good join.
Make it modular on purpose. Three separate framed panels hung with gaps between them is a different and often better-looking object than one large panel with two seams in it. If the design allows it, deliberate separation beats a hidden join.
Send it out. For a one-off large piece, a maker with a bigger bed may be cheaper than the time spent engineering a seam.
Every design in our catalogue ships as SVG, PNG, JPG, PDF, and EPS for preparation in the intended workflow. Inspect the actual filled shapes, open lines and overlaps before dividing the design. Browse the full catalogue at $3.99 a pack, commercial license included with every purchase and no cap on how many physical products you sell.
Frequently Asked Questions
Where should I put the seam in a split design?
Along something the design already contains. A straight edge in the artwork, the boundary between two areas, the edge of a shape. A seam that follows a line the eye expects to see disappears; a seam running through the middle of an open area is the first thing anybody notices.
How do I line up the pieces accurately?
Physically, not by eye. Dowels, biscuits, a rebate, or a backing board the pieces mount onto all give you a mechanical reference. Aligning two large panels by eye and hoping is where a design that was perfect in the file ends up half a millimetre out along a metre of seam.
Does kerf matter when tiling?
It can accumulate when outer profiles are cut on the drawn line without compensation. Each such tile loses one full kerf across its width. Correct toolpath offsets change that result, so measure a test and include any planned gaps in the assembled dimension.
Can I just overlap the pieces instead?
For suitable adhesive vinyl, a small overlap can close a seam; follow the film maker’s guidance and account for the visible extra layer. Expect a faint line where the two thicknesses meet, visible close up rather than across a room, so place the overlap along an edge the design already has. For rigid material an overlap means a real ledge, so butting the edges or using a backing board is usually better.