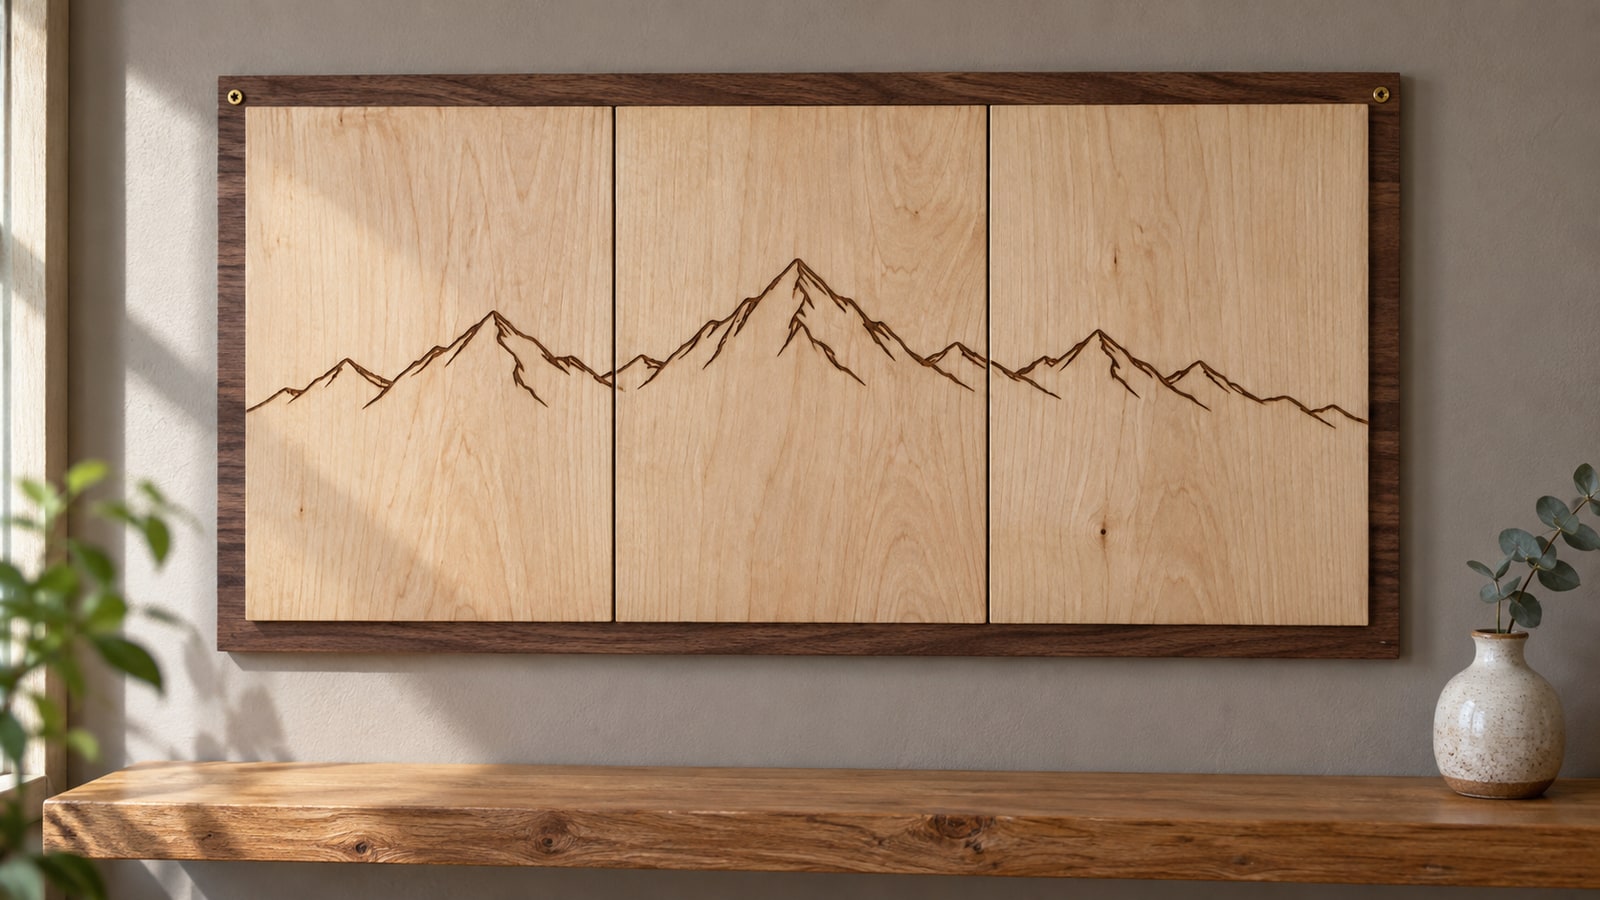
The design was beautiful on screen. It came off the machine in four pieces, because a branch that looked fine at full zoom was thinner than the material could hold.
Offset is the tool for that problem, and for about five others that come up constantly in cut file work. It is one menu item, it is genuinely simple, and almost nobody is taught what it is actually for.
Tip
Short answer: offset moves an outline outward and inset moves it inward, following the shape rather than scaling it. Use outward offset to thicken fragile detail and to put a border round a sticker, and inward offset to create clearance for inlays and to pull artwork back from an edge.
Offset is not scale
The distinction that makes everything else make sense.
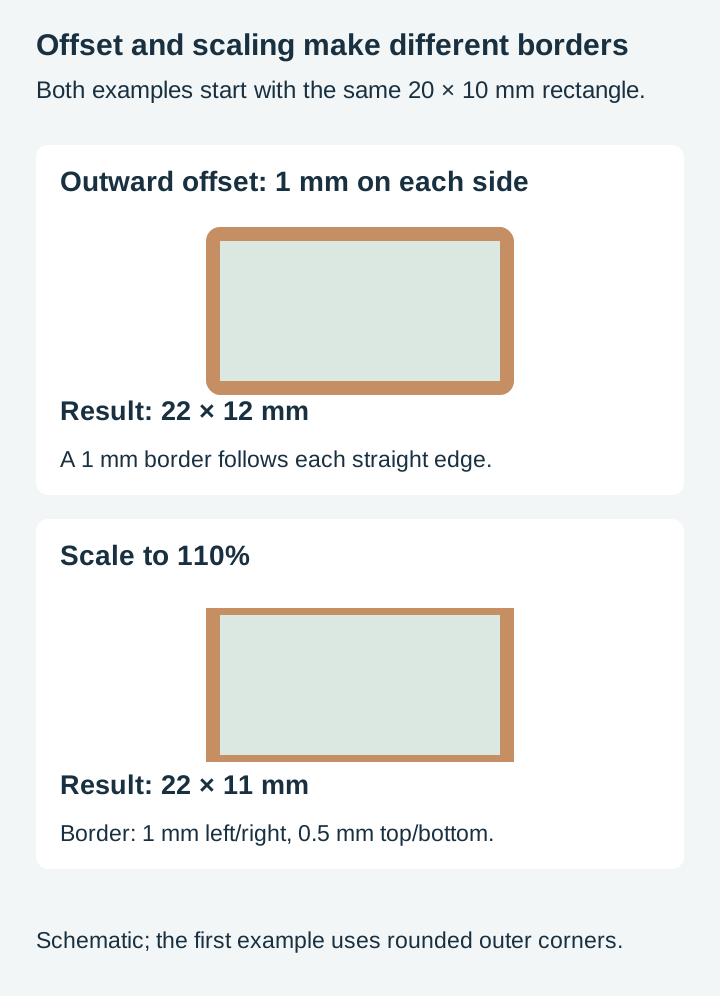
Scaling makes a shape bigger or smaller overall. Every point moves away from or toward a centre, so the shape keeps its proportions and its relative thicknesses. A thin part of a scaled-up design is still thin relative to the whole thing.
Offsetting moves the outline itself, perpendicular to wherever it happens to be running, by a fixed distance. A straight strip grows by twice the outward offset, since it gains material on both sides. That is a proportionally larger change for a thin strip, though strength still depends on the material and geometry.
That difference is the entire point. If your problem is that a design is too small, scale it. If your problem is that parts of it are too fragile, offset it, and the fragile parts benefit disproportionately.
In Inkscape the commands live under Path: Inset at Ctrl and the opening parenthesis key, Outset at Ctrl and the closing parenthesis key, both using a step size set in preferences. Dynamic Offset, at Ctrl and J, gives you a draggable handle so you can see the result as you go, which is far more useful for judging thickness by eye.
For a specified distance and corner treatment, the Offset live path effect provides numeric units and join choices. It was introduced in Inkscape 1.0 and gives more control than judging the distance by eye.
What outward offset is for
Rescuing fragile detail
The headline use. A design with fine branches, thin letter strokes, delicate antlers, or narrow bridges can be strengthened without redrawing it.
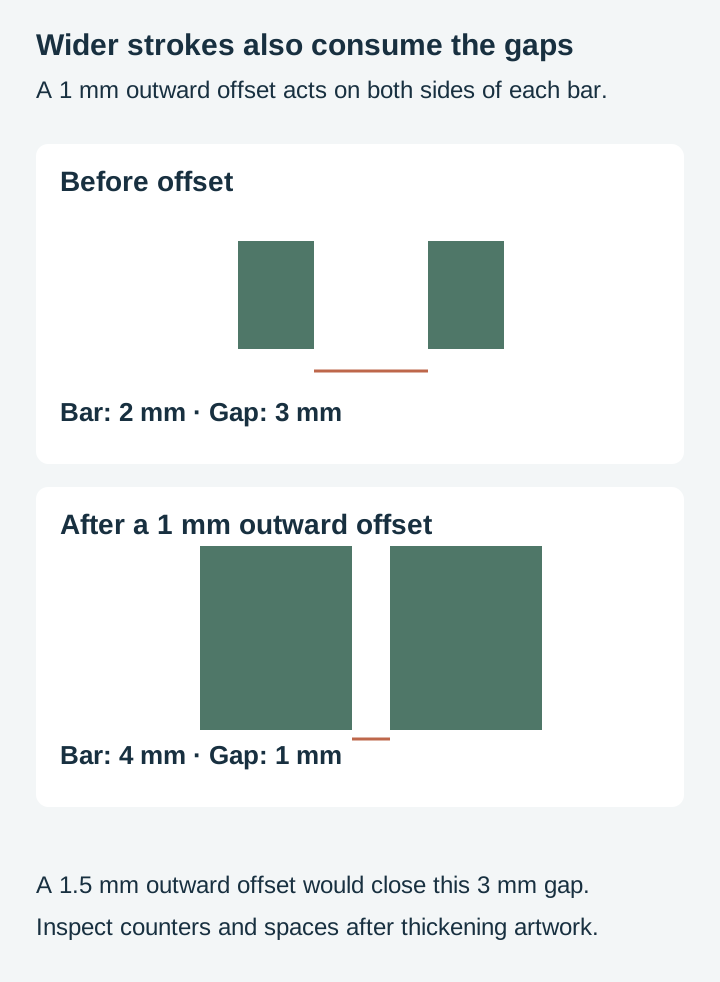
Offset outward by a small amount and every thin part gains material on both sides while the overall silhouette barely changes. Check the new width against your material and test handling; an offset alone does not guarantee survival.
There is a limit, and you will see it: push too far and small gaps between elements close up entirely, turning separate details into one blob. That is the signal you have gone past what offset can fix and the design genuinely needs redrawing at that size.
Putting a border on a sticker
The standard sticker look, a design with a coloured margin around it, is an offset path.
Take the artwork's outline, offset it outward, and that new path becomes your cut line while the original stays as the printed edge. That is exactly the shape a print-then-cut workflow wants. Our print then cut post covers the rest of that process.
Turning a drawn line into a cuttable shape
This trips up nearly everybody once.
For a centerline cut, the machine follows the underlying path rather than the rendered stroke edges. A stroke is a rendering instruction that says draw this path with a pen of a certain thickness. The path underneath is a line with no area at all, so a machine following it makes a single cut, not a strip of material.
The fix is Path, then Stroke to Path, at Ctrl and Alt and C, which converts the stroke into a real closed shape with two edges. If the result is still too thin to survive, offset it outward from there.
What inward offset is for
Inlay clearance
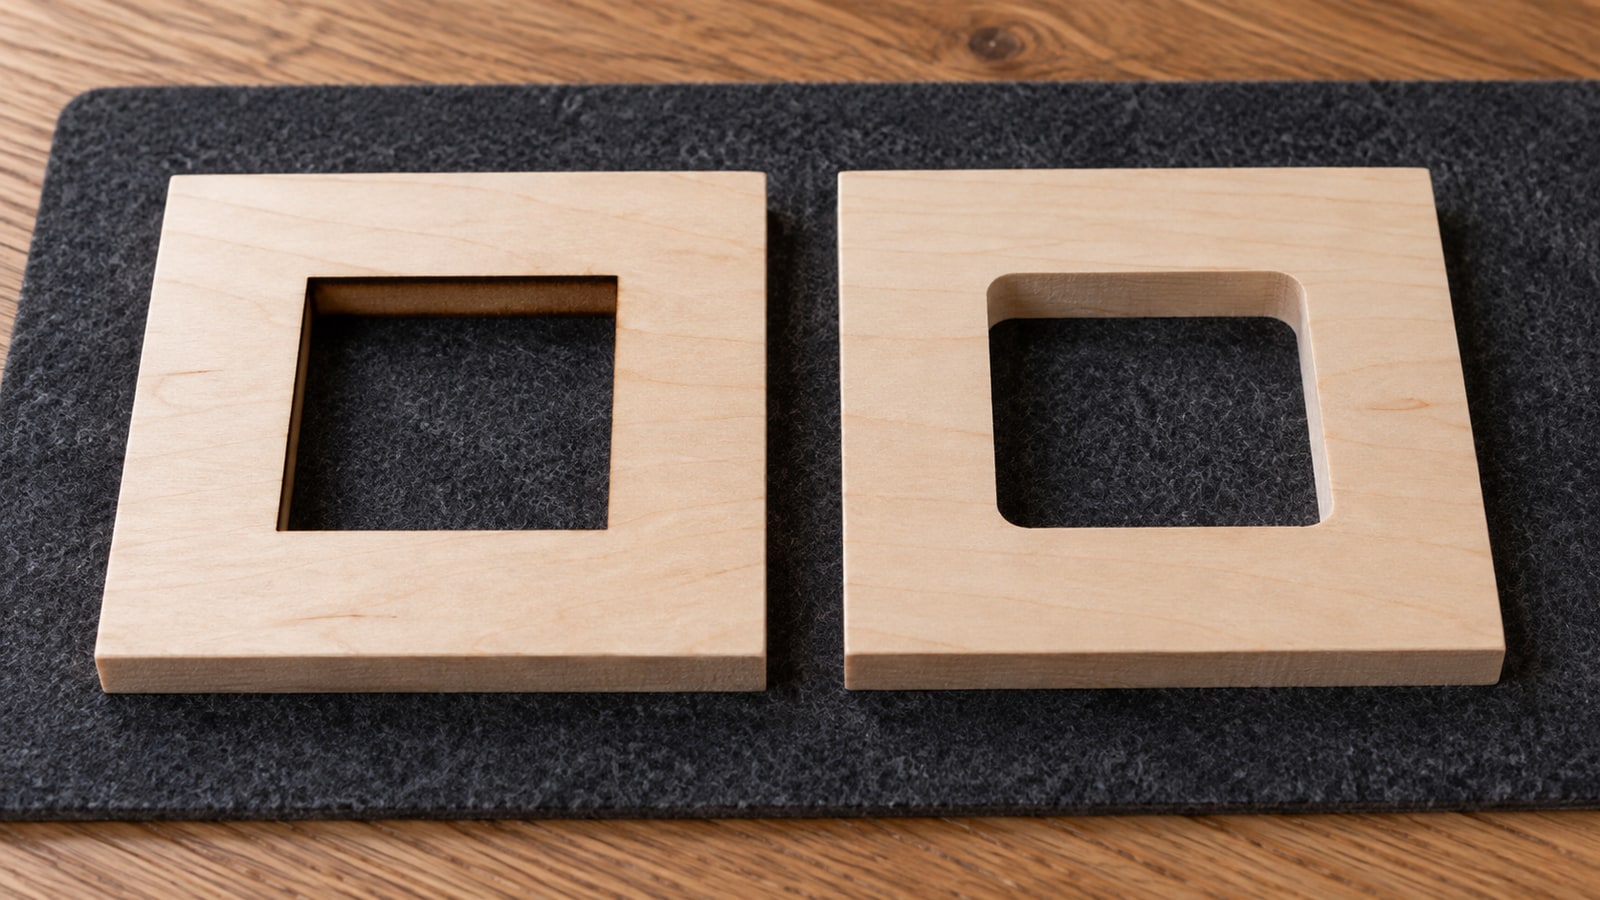
Two pieces that are meant to nest, an inlay and its recess, cannot both be cut from the same outline and expect to fit. The cut removes material along the line, and it does so in opposite directions for the two parts: the inlay comes out smaller than drawn, while the recess comes out larger. For a shared contour and equal kerf, the opening’s width grows by one kerf while the insert’s width shrinks by one kerf. Their width difference is therefore two kerfs, or one kerf of gap per side when centered.
Two separate adjustments are hiding in that. Kerf compensation restores each part to its intended dimensions, where the software supports it. Check whether its input means total kerf width or offset distance, and avoid compensating both the geometry and toolpath unintentionally. Assembly clearance is the extra gap you deliberately want on top, so the pieces actually go together rather than fitting in theory. Both depend on your machine and material, which is why the honest answer is to cut a test rather than take a number from a blog. Our kerf post covers the underlying idea.
Pulling artwork back from an edge
Engraving that runs right up to the edge of a piece rarely looks intentional, and on a cut-through design it can leave almost nothing holding the edge together.
Inset the outer profile, use the inset version as the boundary for your engraving, and you get a consistent margin all the way round without measuring anything.
An outward offset for a shadow layer
Layered pieces often want a slightly larger backing shape behind the top piece. An outward offset of the top shape creates a specified margin along its edges; corner joins determine how the border behaves at tips. Doing it by scaling instead gives you a margin that is wider at the extremities and thinner in the middle, and it always looks slightly wrong without it being obvious why.
The three things that go wrong
Corners get strange. Offsetting a sharp corner is geometrically ambiguous, so the algorithm picks something. On tight corners and in narrow gaps the result can bulge or pinch. Trying several small offsets instead of one large one is worth attempting, though repeated insets can degrade geometry in their own way, so inspect the result rather than assuming it is safer.
Self-intersections appear. Offset a shape inward far enough and opposite edges meet and pass through each other, producing loops that render as unexpected holes. If an inset result looks wrong, this is usually why, and the answer is a smaller offset.
Node count climbs. Offset paths generally carry more nodes than their originals, and repeated offsets compound it. Worth a look afterwards if the file starts feeling heavy. Our node count post covers when that matters.
The workflow
Order saves rework here, same as with boolean operations.
- Convert strokes to paths first, so everything you are working with is a real area.
- Merge overlaps before offsetting. Offsetting a group of overlapping shapes individually gives you a mess of intersecting outlines. Union them into one path, then offset once.
- Duplicate before you commit. Inset and Outset replace the path they are applied to. Dynamic Offset is the exception: it retains source geometry internally and stays adjustable, which is why it is the better tool when you are still deciding how far to go.
- Offset in small steps and look at the corners each time.
- Check the result with the node tool, and confirm nothing has closed up that was meant to stay open.
Where to start
Take a design you have broken before and offset it outward by a small amount, then compare the thin parts side by side. The difference in survivability is usually much larger than the visual difference, which is the whole reason this tool is worth knowing.
Our designs ship as SVG, PNG, JPG, PDF, and EPS. Check the selected design at your actual size and adapt thin regions or supports for the intended material. Browse the full catalogue at $3.99 a pack, commercial license included with every purchase.
Frequently Asked Questions
What does offset actually do to a path?
It moves the outline outward or inward by a distance, following the shape. Offsetting outward makes the shape fatter and closes small gaps; offsetting inward makes it thinner and opens them. It is not scaling, which changes overall size and moves everything away from a centre point. Offset changes thickness while keeping the shape roughly where it was.
How do I turn a thin drawn line into something I can cut?
A centerline toolpath follows the path itself. A visible SVG stroke width does not necessarily become a cuttable strip; importer behavior varies. Convert the stroke to a path so it becomes a real shape with two edges, then offset if it is still too thin. Inkscape does the first step under Path, then Stroke to Path.
Why does my offset produce weird lumps at the corners?
Because offsetting a sharp corner has no single correct answer geometrically, so the algorithm has to choose. Large offsets on shapes with tight corners or narrow gaps are where it looks worst. Choose the appropriate round, bevel or miter join when available, and inspect the result. Repeating smaller offsets is not guaranteed to preserve the shape better.
How much clearance does an inlay need?
Separate compensation for tool or beam width from the extra assembly gap you intend. Finish and adhesive can affect fit too. Test the combined setup rather than treating kerf itself as the required clearance. It depends on your machine, your material, and your bit or beam width, which is why nobody can give you a figure that will be right on your setup.