The front came out perfectly. You turned the piece over, ran the second file, and the back is upside down, or shifted half a centimetre, or mirrored so the design reads backwards.
Two-sided work has exactly two problems, and they are independent. The back-face reference has to match the chosen physical flip, and the piece has to return to the same place after you turn it over. Solve one and not the other and the result still fails.
Tip
Short answer: reflect the outline and feature positions around the same axis used to turn the stock over. Keep lettering readable when it is viewed directly on the back. Use repeatable registration for both faces. For whole-sheet work, leave the outer cut until the engraving is complete; pre-cut blanks can instead be held in a suitable fixture.
Two separate problems
Worth separating, because people usually fix one and then cannot work out why it still fails.
The positioning problem is about geometry. Flipping the piece mirrors its outline as far as the machine is concerned: what was the left edge is now the right one. Back-side artwork laid out against the original outline is therefore being measured against a shape that is now reversed, so anything off-centre lands on the wrong side. Mirroring the outline you position against is what cancels that out.
The registration problem is about position. Turning a piece over by hand puts it down somewhere approximately similar to where it was. Approximately is not good enough when the two sides need to line up.
Both have to be solved. Neither solves the other.
What actually needs mirroring
This is where the common advice misleads, so it is worth being precise.
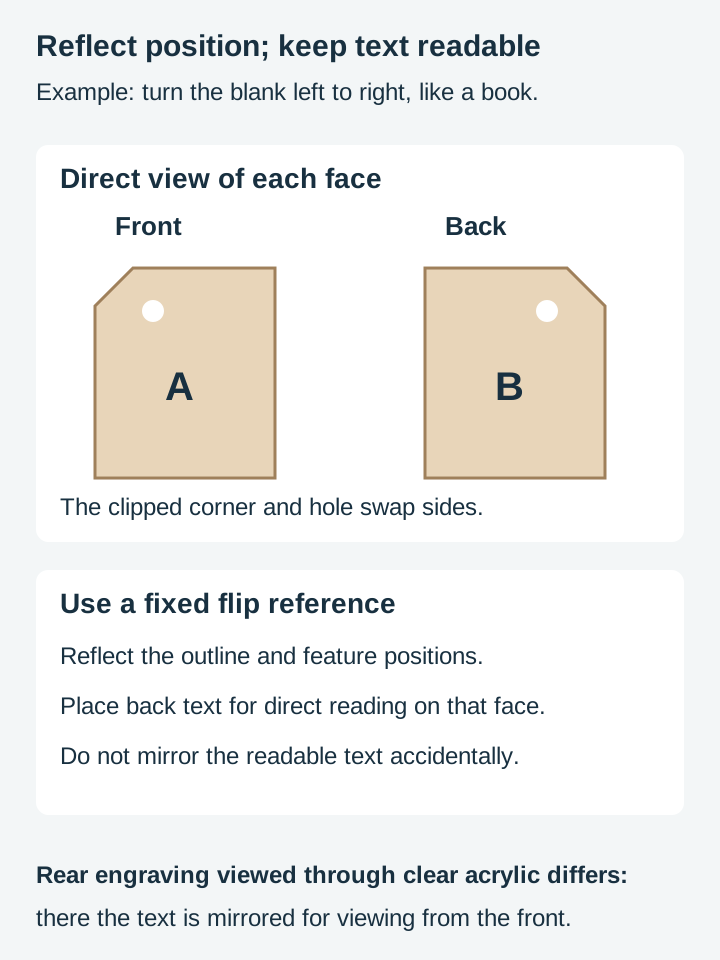
The text does not. Engrave the back normally and it reads correctly when you turn the piece over, because you are looking at that face directly. People expect to need a mirrored file and then get a genuinely backwards result when they use one.
The outline does. If the piece is asymmetric, flipping it presents a mirrored shape to the machine, so the reference you position the back artwork against has to be the mirrored outline. Get that wrong and a design intended for the top-left corner appears in the top-right.
Symmetrical outer profiles simplify it. A rectangle or circle can occupy the same outline after a flip, but an off-center hole or design still changes position. Mark orientation and track those features.
Clear material is the exception that does need mirrored text. Engraving the back of acrylic so it is read through the front means the viewer sees it through the sheet, and there it genuinely has to be reversed.
Mirror on the same axis you physically flip around: left to right means mirror horizontally, top to bottom means mirror vertically. Doing the wrong one gives you a result rotated a hundred and eighty degrees, which reads as a positioning fault rather than a mirroring one.
One more detail that bites. Most software mirrors around the selection's own centre by default, so mirroring an off-centre back layer on its own flips it in place and leaves it exactly where it was. Reflect the reference geometry around the fixed stock or fixture axis. Then position back-face text so it reads normally when that face is viewed directly. Do not blindly mirror all artwork and reverse readable lettering. Two-sided CAM tools may manage this transformation for you; avoid applying it twice.
Pick one flip direction and always use it. Write it on the jig. Mixed flip directions across a batch produce a job where most pieces are right and two are not, with nothing in the file to say which.
Our mirror and flip post covers the operation itself in more detail.
Registration, and why a jig wins
Getting the piece back in the same place is the harder half, and there are three approaches.
The jig
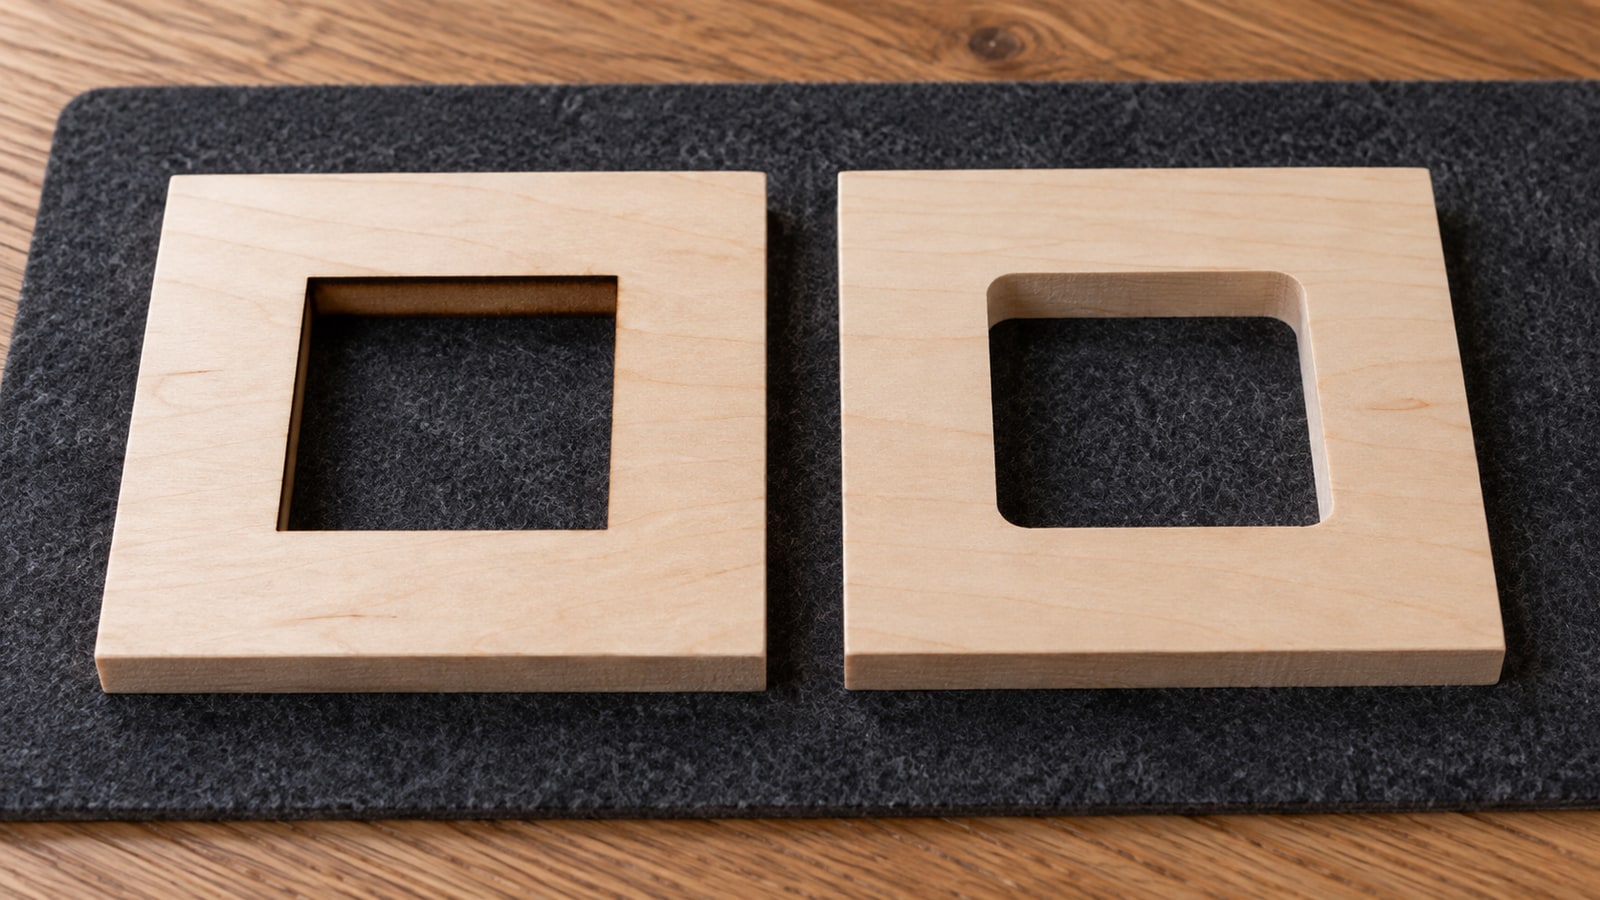
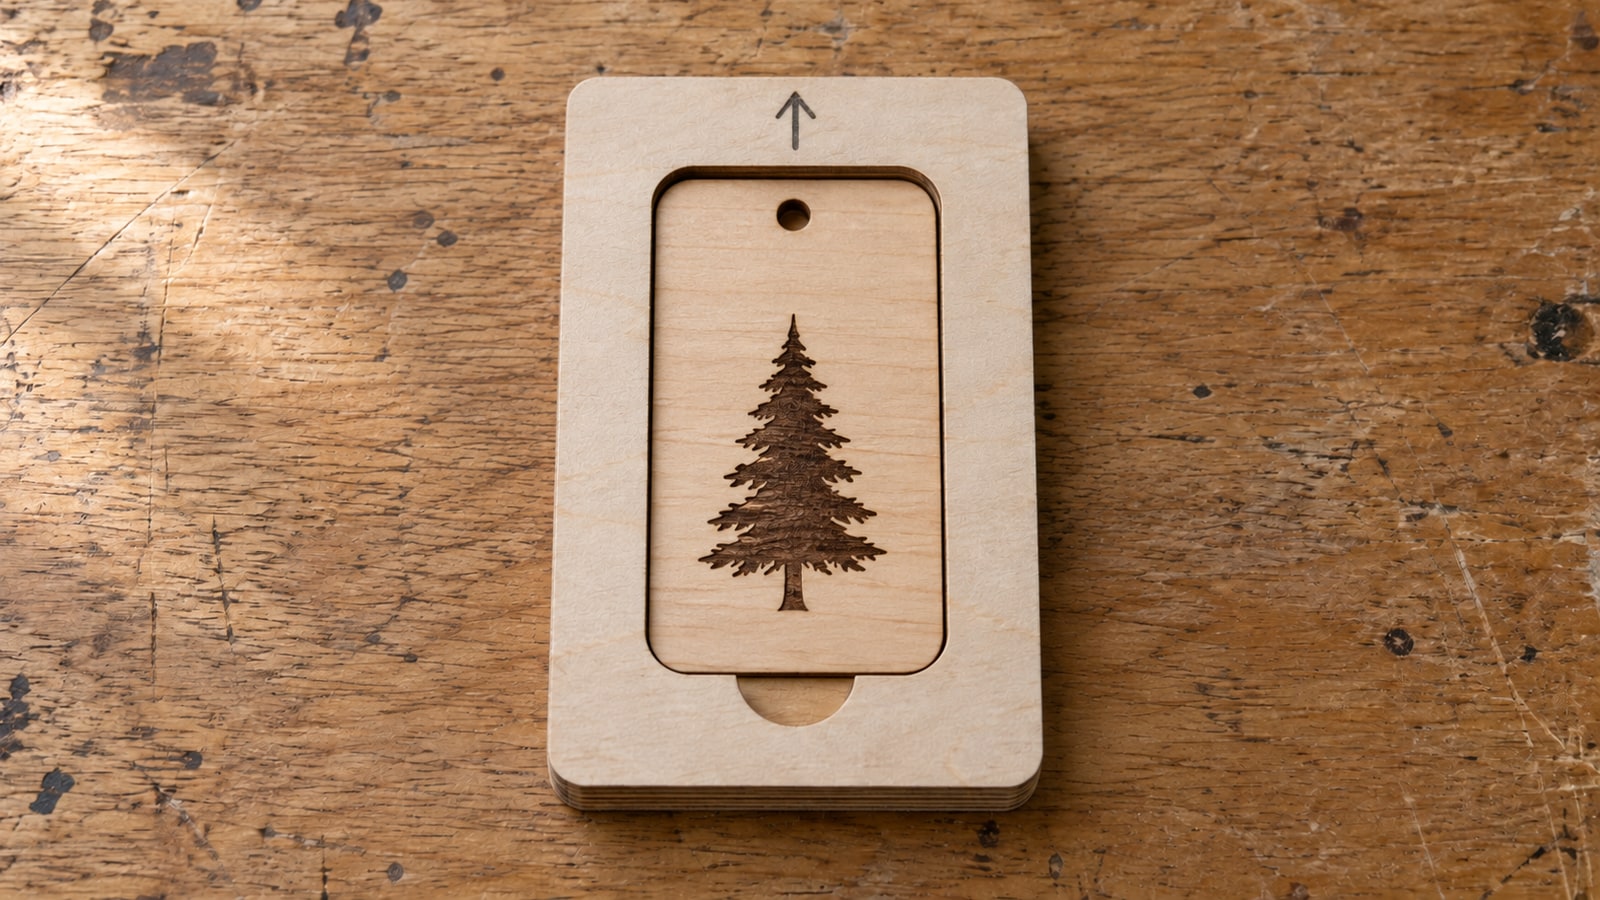
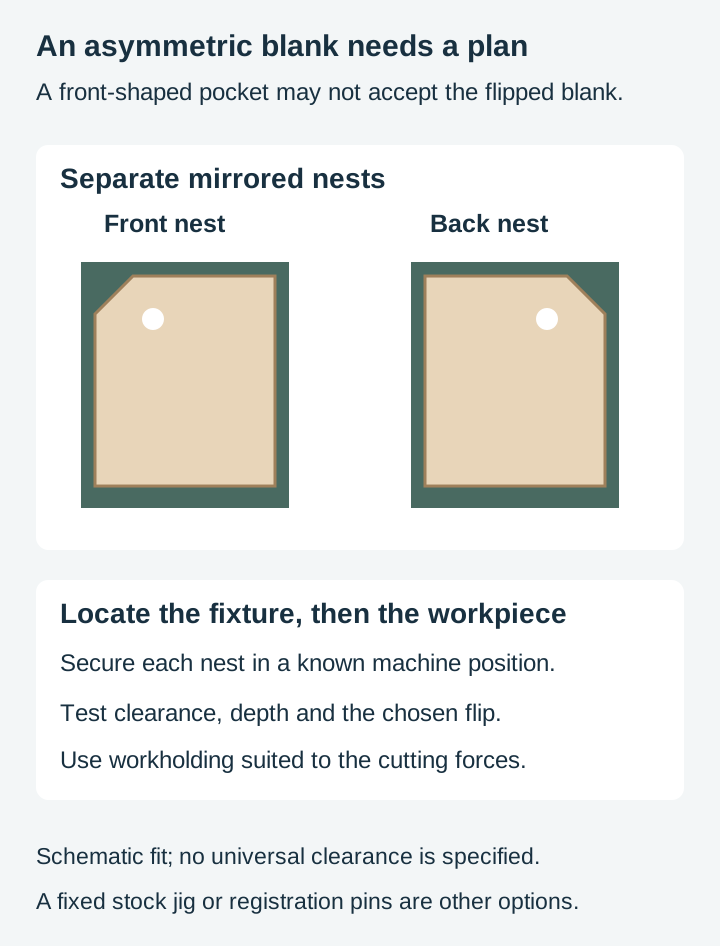
Make a supported recess that locates the workpiece, and secure the fixture in a known position. An asymmetric blank may need separate mirrored front and back nests; a symmetric blank needs an orientation cue. A recess alone is not adequate restraint for every CNC cutting load.
This is the reliable answer for anything repeated, and it is worth the ten minutes because it reuses the piece’s geometry. Measure or test the actual fit after accounting for the cutting process.
Two details make the difference. Give the recess a small clearance so the piece drops in rather than needing to be pressed, and cut a finger notch at one edge so you can get the piece back out without levering it. And add an orientation mark to the jig so a symmetrical piece cannot go in rotated.
Flipping a registered whole sheet
An alternative is to engrave the front, turn the whole sheet over about the planned axis, locate it against repeatable stops or registration pins, and engrave the back before freeing the pieces. Follow the machine’s workholding and job setup requirements.
That keeps every piece in its correct position relative to every other, since nothing has been cut free. The sheet itself still has to go back down in the same place though, so you need registration marks or physical stops. One stop along a single edge is not enough, because the sheet can still slide along it; two edges, or a corner, is what actually locates it.
Registration marks
Marks you align to by eye after flipping. Two on opposite corners give you both position and rotation; one gives you position only, and the piece can still sit rotated.
The catch on opaque material is that any mark engraved on the front is hidden once that face is down, and on a whole-sheet flip that applies to marks on the waste sheet too. The targets have to be on something that does not turn over: the bed, a jig, or fixed stops, with a known relationship to where the artwork sits. That is what makes this the most fiddly of the three, and it suits one-off work where cutting a jig is not worth the material. The same alignment thinking applies to stacking coloured layers, which our layered designs guide covers.
The order of operations
This is where a good file earns its keep, and it is entirely a design-side decision.
- Engrave the front.
- Flip and engrave the back.
- Cut the outline last.
Cutting last matters because a piece that is still held in the surrounding sheet cannot move. The moment it is cut free it can shift, tilt, or drop, and anything engraved afterwards lands wherever it happens to be sitting.
If you are working with a piece that is already cut, blanks, or something bought pre-shaped, you need something else holding its position. A cut-out jig is the usual answer, though registering against a fixed corner or using vacuum workholding solves the same problem if you have them.
This is the same layer-ordering discipline covered in our engrave, score or cut post: assign the intended operations and order in the machine software, then inspect the preview. Layer colors alone do not guarantee the sequence.
Setting up the file
A practical structure that works.
Keep front and back on separate layers, clearly named. Not two files, because two files drift apart the moment you edit one.
Keep the outline on its own layer, so it can be run last independently.
Put the jig on its own layer too. The same outline, offset for clearance, plus a finger notch. Coming from the same geometry gets you close, but not automatically to a fit: the cut removes material, so a recess cut on the outline comes out larger than the piece, and how much clearance you actually want is worth a test rather than an assumption. If the piece is asymmetric and you are flipping it into the jig, the recess needs the mirrored outline.
Save a verified back-face setup. The outline and feature positions must match the flip, while direct-view text remains readable. In software with a two-sided job mode, set its flip direction and inspect both views rather than adding an extra manual mirror. See Vectric’s two-sided job setup.
Mark the orientation. A pencil mark on an exposed waste area, an arrow on the fixed jig, or a keyed reference can make orientation clear. Symmetrical pieces are where two-sided work goes wrong most often, because there is no visual cue that the piece went back in rotated.
Where it goes wrong
Mirroring the wrong axis. Design is correct but rotated. Check which way you physically flipped.
Mirroring the wrong content. Direct-view text can end up backward if mirrored unnecessarily. A correctly readable label can still be misplaced if its reference outline was not reflected.
Cutting the outline first. Piece shifts and the back is offset by an unpredictable amount, differently on every piece in the batch.
A jig with no clearance. The piece jams, you force it, and either the piece or the jig is damaged.
A symmetrical piece with no orientation mark. Half the batch comes out with the back rotated, and everything looks correct in the file.
Material thickness variation. On anything focus-dependent, a piece that sits slightly proud or low in a jig changes the working distance. Worth knowing if results vary across a batch that should be identical.
Where to start
Make a jig for a piece you already cut, using the same outline offset for clearance, and run a two-sided test on scrap. That single exercise teaches both halves at once, and you keep the jig.
Then write your flip direction on the jig, because in three weeks you will not remember which way you turned it.
Every design in our catalogue ships as SVG, PNG, JPG, PDF, and EPS for different workflows. Separate the selected artwork into front, back and outline operations as your project requires. Browse the full catalogue at $3.99 a pack, commercial license included with every purchase and no cap on how many physical products you sell.
Frequently Asked Questions
Why does my second side land in the wrong place?
Because flipping the piece mirrors its outline as the machine sees it. If the back artwork was positioned against the original outline, it is now measured against a shape that is the wrong way round, so anything off-centre ends up on the wrong side. A symmetric outer profile simplifies the outline, but off-center holes and artwork still require the correct flip reference.
Do I need to mirror the text on the back?
Usually not. Engrave it normally and it reads correctly when you turn the piece over, because you are looking at that face directly. The exception is engraving the back of clear material to be viewed through the front, where the text is read through the sheet and does have to be mirrored.
Do I need a jig?
A jig or another repeatable locating method is useful. The fixture must itself stay registered, and its clearance, support and orientation determine how accurately the workpiece returns. It is the difference between two-sided work being repeatable and being a fresh alignment problem on every piece.
Can I cut the outline before engraving the back?
It is usually a mistake. Once a piece is cut free it can shift, and there is nothing holding its position. The reliable order is to engrave the front, engrave the back, then cut the outline last, or to cut the piece and then use a jig to hold it.