There is a particular plaque that sends people looking for this. A bull elk or an eagle standing out of a walnut panel with real shadow pooling under the form, the sort of thing a CNC router produces over an afternoon of roughing and finishing passes. You own a laser instead. Then you find a mode in your laser software called Grayscale, or a checkbox called Vary Power, or a menu item called 3D Engrave, and it looks like the answer.
It is an answer. It is a smaller one than the name suggests, and knowing exactly how much smaller before you commit a board is the difference between a piece you keep and an afternoon spent sanding a brown mess off a nice bit of maple.
Tip
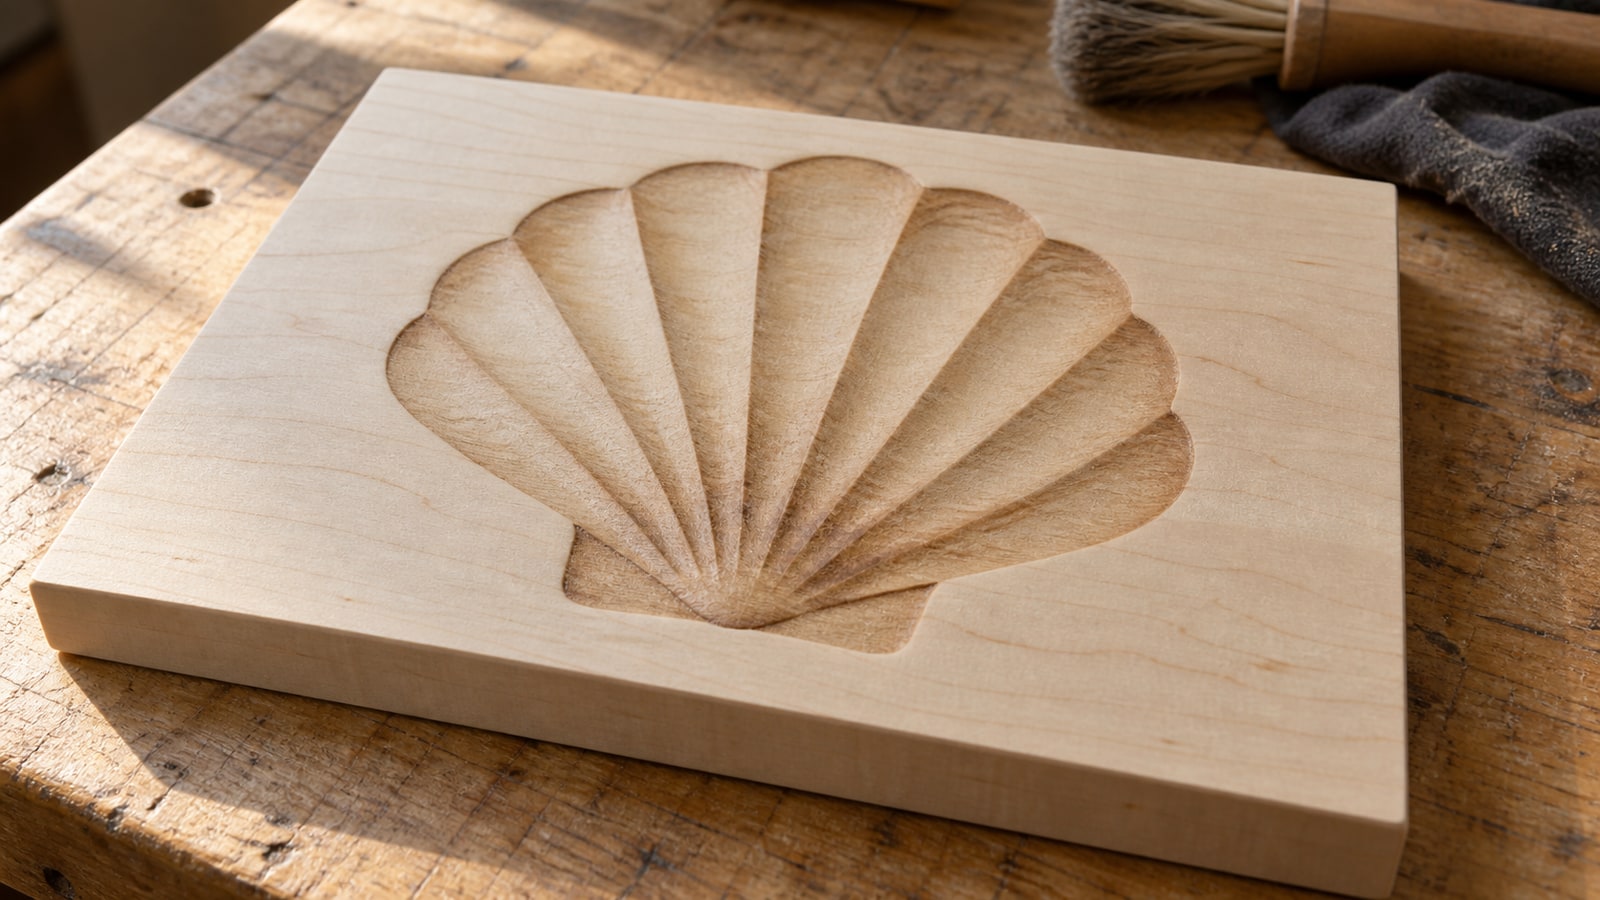
Short answer: grayscale mode varies laser power from a greyscale depth map, so dark areas of the image get more power and burn deeper. You get real, shallow, tactile relief. The resulting depth depends on the material, laser and pass strategy. Unlike a router toolpath, a power value does not directly specify a finished Z height.
Three different things get called relief engraving
This is where most of the confusion starts, because all three produce a picture on a piece of wood and only one of them is what this post is about.
Dithered photo engraving. The laser stays at one power and switches on and off thousands of times per line. Shading is faked by dot density, exactly like a newspaper photo. This is what you use for a photographic likeness, and is intended to reproduce tones rather than a commanded height surface. Heat overlap and material variation can still affect local depth. If that is the job in front of you, our guide to preparing a photo for laser engraving is the one you want.
Grayscale depth engraving. The laser modulates power continuously as it scans, so the darker the pixel, the harder it burns and the more material goes. This is the subject of this post, and it needs a completely different source image: a greyscale depth map, where brightness means height rather than colour.
Drawn relief linework. Vector art that looks sculpted because someone drew it that way. Directional hatching wraps the form, a cast shadow lifts the subject off the background, and shallow surface engraving reproduces the drawing. The surface may have some texture, and the eye reads it as carved anyway.
That third one is what our relief medallion packs are, and we would rather be blunt about it than let the word relief do something misleading. The artwork is vector line art, and it ships as SVG, PNG, JPG, PDF, and EPS like everything else we sell. The supplied artwork is shaded line art, not a height map. PNG and other raster formats can store height maps, but the contents must encode height deliberately. Simply rasterizing the hatching does not recover the modeled surface.
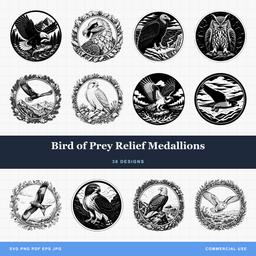 Bird of Prey Relief Medallions38 designs, commercial license included$3.99
The bird of prey set is a good illustration of the trade. Those falcon and eagle heads are drawn with hatching that follows the feather groups and a hard cast shadow along one side, which is precisely the cue your eye uses to decide something is three dimensional. A surface-engraving interpretation needs no separate height model, but still needs compatible material, suitable settings and a test. Runtime and pass count depend on the actual job. That is a different product from a grayscale carve, not a lesser version of one.
What grayscale mode is actually doing
Nothing clever, which is the good news. It reads the brightness of each pixel and picks a power level.
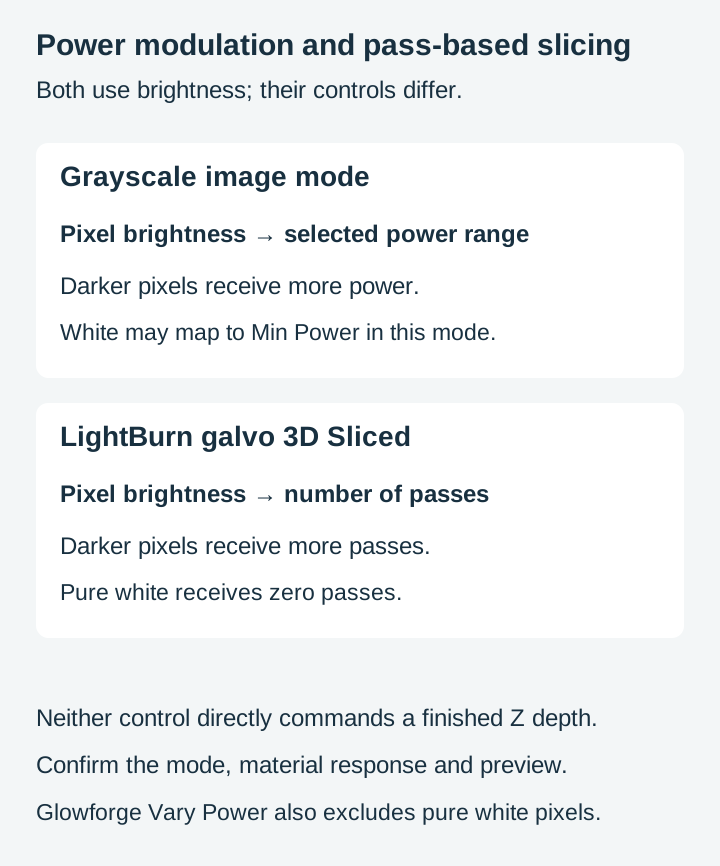
LightBurn's Image Mode documentation describes Grayscale as a mapping from pixel brightness to the selected minimum and maximum power, with darker pixels receiving more power. That is the whole mechanism. Your Min Power and Max Power settings become the two ends of a ramp, and the image decides where along that ramp each spot sits.
Glowforge’s manual mode documentation describes Vary Power as another brightness-to-power mapping. Its Min Power control is relative to the chosen maximum, and pure white pixels are ignored regardless of those settings.
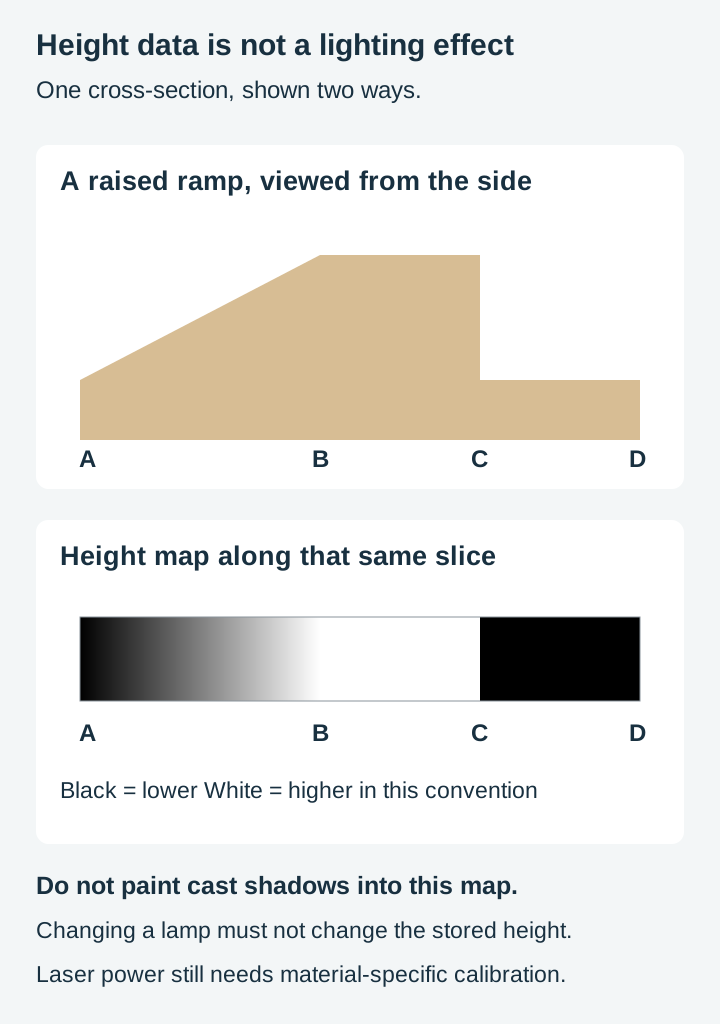
The input has to be a depth map, not a photograph and not a drawing. A depth map is a greyscale image where each pixel's brightness stands for a height, white at the surface and black at the deepest point. That is a whole topic on its own and we have written it up separately in what a depth map is and how to use it, including why a photograph fed in raw carves a black dog as a hole in the wall.
The important bit for laser work is the convention. Dark burns deeper. More power can also char wood, but final darkness is not a reliable depth measurement.
Power values do not command a Z height
A router removes material with a cutter of known diameter, driven to a commanded Z height. A correctly set up toolpath targets a measurable depth, subject to calibration, tool deflection and stock movement. Cutting also exposes fresh wood rather than relying on charring for contrast.
A laser removes material by burning it away. How much leaves per pass depends on the material, the moisture in it, the focus, and the assist air, none of which your software knows about. LightBurn’s 3D Sliced Engravings is a separate galvo technique that assigns different pass counts by shade. Its documentation also notes that the process does not directly specify the final depth. Do not confuse pass-based slicing with ordinary grayscale power modulation.
Four consequences follow, and all four are worth understanding before you design around them.
Depth and tone can be coupled in wood. More energy can change both material removal and charring, but there is no universal one-to-one relationship between darkness and depth. Air assist, wavelength, pulse behavior, cleaning and the wood itself all matter.
The beam is a cone, and it is focused at one height. Your focus sits at the original surface. As the engrave deepens, the material falls away from that focus point, the spot widens, and the cut slows down and blurs. Depth of focus and the permitted refocusing strategy limit how the beam interacts with a deepening surface.
Fine raised detail undercuts. Because the beam has width and the sides get hit on every neighbouring pass, a thin element standing above a deep field gets eaten from both sides. Thin raised features may erode or break; survival depends on feature size and the process.
Additional passes increase runtime. LightBurn’s galvo documentation advises reconsidering power when increasing the pass count. Repeated passes can increase removal, but the relationship depends on the strategy and material; compare previews and tests for the actual job.
None of that makes the technique pointless. It makes it a shallow relief technique, which is a real and useful category. Coins are shallow relief. So are pressed leather medallions and cast pewter badges, and nobody thinks less of them for it.
Which machines can do it at all
Support varies more than you would expect, and the differences are documented rather than folklore. Everything in this table is taken from the manufacturer documentation linked above rather than from bench results of our own.
| Machine type | What the documentation says |
|---|---|
| CO2, DSP controlled | LightBurn notes that on CO2 lasers grayscale mode "can achieve variable depth (3D) engraving rather than shading". Check controller and material support |
| Diode | LightBurn says the mode "can provide great shading but is harder to get right than plain dithering" on diode machines. Physical removal still depends on the particular laser and material |
| Galvo fiber | Has its own dedicated 3D Sliced mode that takes a depth map and engraves lighter pixels with fewer passes than darker ones. This pass-based mode is separate from grayscale power modulation |
| UV | LightBurn states grayscale mode "is not compatible with UV lasers" because they vary output using frequency rather than power. Power locks to 20% and you get a solid grey rectangle |
| Glowforge | Vary Power in manual mode, where the power setting controls the depth of the darkest parts and Min Power the lightest |
The diode row is the one that disappoints people most often, and it is worth reading carefully. A diode laser can genuinely produce beautiful tonal shading in grayscale mode. What it will struggle to produce is meaningful physical depth, depending on the system’s power, focus and the material. Set the target from documented capability and a test rather than the diode label alone.
Where the depth map comes from
You need a greyscale image built as height data. Three routes exist and only one of them is quick.
A render from a 3D model. Mathematically exact and the way commercial relief libraries are made. Requires a model.
Painted by hand. Soft brushes, lighter for higher, darker for lower, in any image editor. Total control and genuinely slow, and it is the route that teaches you the most about why a depth map fails.
A conversion tool. Craftgineer's ReliefMaker estimates a plausible surface from a flat illustration and outputs a greyscale map. Craftgineer is our sister site, so take the recommendation with that in mind. It runs free in its local mode with a free Craftgineer account, and has an optional paid mode. Every tool on that site requires an account, so expect a sign-in screen.
Whatever route you take, prepare the map with the laser in mind rather than the router. Stretch the tonal range so the deepest point sits at or near black and the highest at or near white, because a map living entirely in the middle greys throws away most of your already limited depth range. Then get rid of anything you do not want burned: LightBurn Grayscale maps white to minimum power, which may still mark. Glowforge Vary Power and LightBurn 3D Sliced exclude pure white. Check the actual mode, and mask or exclude areas that must remain untouched when necessary.
Which subjects survive the translation
This is the part nobody tells you, and it is where our side of the craft actually applies. We draw these files for a living, so we spend a lot of time deciding which forms hold up when the process flattens them.
Shallow relief compresses everything. A form that relies on one plane sitting well in front of another loses that separation immediately, because there is no room for the planes to be genuinely apart. So the subjects that survive are the ones that read through broad rounded mass rather than through depth or fine texture.
Works well. A bison shoulder and skull. A bear head in three quarter view. A single large bloom. A shell. A big cat's face. Anything where the shape is a few large curved masses meeting each other, and where the eye is reading the roll of a surface rather than the space between two things.
Needs closer testing. Individual feather barbs, fish scales, fur strands and lace can merge when their features fall below the process’s useful resolution. Increase the size or simplify detail, and test the actual material. A router also has a resolution limit set partly by cutter geometry.
Needs deliberate depth planning. A scene with an animal in front of a treeline needs enough separation to read at the available relief depth. Simplifying the background and modeling distinct height bands can help.
Two design habits help a great deal. Keep lighting and cast shadows out of the height map: brightness should encode height, not illumination. Use the software’s separate shaded preview to judge the form. And close the composition with a raised rim or a border, because a defined edge gives the eye a reference height and makes the interior read as deeper than it is. That second trick is why medallion formats suit this technique so well, and there is more on picking a subject that agrees with a circular frame in our guide to choosing a relief design for a round blank.
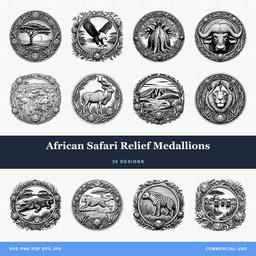 African Safari Relief Medallions30 designs, commercial license included$3.99
Material decides more than settings do
Grayscale relief needs a material whose response to a power change is smooth and consistent. Get that wrong and no amount of curve tweaking rescues it.
Tight-grained hardwoods behave best, because the material at the bottom of the engrave is the same as the material at the top. Open-grained woods give you soft earlywood and hard latewood alternating across the panel, and since those bands remove at different rates, the finished surface carries stripes that belong to the tree rather than to your artwork.
Plywood is the common trap. It looks like a hardwood panel until the engrave reaches the glue line, at which point the glue line is a hard flat plane sitting at one fixed height right through your relief. Core voids are worse and appear as holes. If a piece matters, use solid stock. Our notes on choosing materials for laser engraving cover the wider comparison.
Cast acrylic is the other strong pick and for the opposite reason. It marks frosted white rather than charred brown, so depth reads as light and shade instead of scorch colour. That breaks the depth-equals-darkness coupling described above, which is why so much of the impressive grayscale relief work you see online is on acrylic rather than wood.
Slate is a poor first choice for controlled sculpted depth. It fractures and varies naturally, so a simple power ramp is not a dependable height calibration. Slate is superb for line art and dithered images, which our guide to engraving on slate goes into, and it is the wrong material for this particular trick.
Setting up a run without burning a stack of boards
- Make a grey step wedge and engrave it on scrap. A strip of flat patches stepping from white to black, same material, same settings you intend to use. This tells you where your material stops getting darker, where it starts getting deeper, and how much of the middle of the range is actually useful.
- Read the wedge honestly. The response will not be linear. Expect a chunk of the light end to do almost nothing and a chunk of the dark end to all look the same. The usable span is what sits between them.
- Remap the depth map to that usable span. Pull the map's black and white points inward to match what the wedge showed you, rather than sending a full range image and hoping.
- Choose Min Power for the intended highlights. A highlight that should remain untouched needs a non-marking setting or exclusion from the processed region. Test rather than raising minimum power automatically.
- Tune power and passes together. Excessive energy in one pass can damage detail, while repeated passes also accumulate heat. Glowforge's documentation makes the same point from the other side, noting that higher power "produces less-detailed engraves".
- Refocus between passes if your machine allows it. The surface has dropped. Refocusing to the new surface keeps the spot tight instead of letting it spread as the engrave deepens.
- Clean and finish for the material. On wood, test gentle cleanup and any finish before treating the final piece. Do not apply wood sanding-and-oiling instructions to acrylic or metal.
- Look at it under raking light. Shallow relief needs a light source coming across it at an angle. Under flat overhead light your work will look like a flat brown picture, which is a distressing way to judge a piece you just spent an hour on.
When to skip it and just engrave the drawing
Here is the trade in plain terms, because both routes are legitimate and the choice depends on what you are making rather than on which is better.
| Grayscale depth engraving | Drawn relief linework | |
|---|---|---|
| Source file | Deliberately prepared grayscale height map | SVG or raster representation of the drawing |
| What you get | Process-dependent physical depth and surface appearance | Surface marks whose drawn shading suggests depth |
| Machine time | Depends on area, depth and pass strategy | Depends on area, detail and settings |
| Prep | Height-map preparation and material trials | Artwork preparation, focus and a material test |
| Repeatability | Varies with material and process | Still depends on blank consistency and settings |
| Best for | One-off showpieces, acrylic, gifts you will hand over | Market stock, batch runs, mixed materials |
If you are making one special thing and you want somebody to run a thumb over it, the grayscale route earns its afternoon. For a batch of coasters, compare the actual previews and test results before committing the production time.
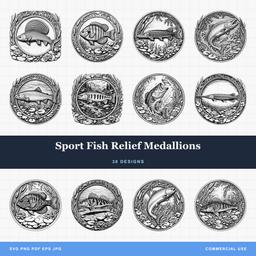 Sport Fish Relief Medallions30 designs, commercial license included$3.99African Safari Relief Medallions30 designs, commercial license included$3.99Bird of Prey Relief Medallions38 designs, commercial license included$3.99
Every relief medallion pack is $3.99, includes a commercial license covering unlimited physical products including print-on-demand, and ships as SVG, PNG, JPG, PDF, and EPS. Browse them across Birds, Safari and Exotic, Sea Life, and Wildlife, and new designs go up regularly.
And if you do go the grayscale route, start with something forgiving. A bear head on a scrap of solid maple, one test wedge first, no fine texture anywhere in the map. It will teach you your machine's response curve in one afternoon, and that curve is the thing every future relief job depends on.
Designs for this project
Frequently Asked Questions
Can a laser do 3D relief engraving?
A suitable laser process can remove material to create real relief. Grayscale image mode varies laser power from a greyscale depth map so darker pixels burn deeper, which produces a shallow relief you can feel with a fingertip. It is not the same as a router carving a modelled surface with a ball nose. LightBurn’s separate galvo 3D Sliced mode uses repeated passes and does not directly command an exact finished Z depth.
What is the difference between grayscale mode and dithering?
Dithering keeps the laser at one power and fakes shading by varying how many dots land in an area, which is how photographs are engraved. Grayscale mode does not dither at all. LightBurn describes it as varying power output as a percentage between Min and Max Power, using Min Power for the lightest shades and Max Power for the darkest, so the shade comes from mark intensity and depth rather than dot spacing.
Can I use a relief medallion SVG for grayscale 3D engraving?
No. Our relief medallion packs are vector line art, so the sculpted look is drawn with hatching rather than stored as height. Grayscale mode needs a greyscale raster image where brightness means height. Engrave the medallion SVGs as ordinary flat linework and the carved look still reads, because the illusion is in the drawing.
Which materials work best for grayscale relief engraving?
Materials that respond smoothly and predictably to a change in power. Tight-grained hardwoods and cast acrylic are the usual picks. Plywood is unreliable because the glue lines and core voids sit at a fixed height and appear as soon as the engrave gets deep enough to reach them. Slate is a poor starting point for predictable sculpted depth because it fractures and varies naturally; use a material with documented behavior for the intended process.