There is a specific flavour of dread that comes with a new sheet of material. You bought a nice piece of walnut ply, or a sheet of coloured acrylic you have been eyeing for weeks, and now you have to guess at settings. Guess too gentle and you waste a pass. Guess too aggressive and you have a scorched, tapered edge on a piece you cannot recut because you only bought one sheet.
Most people respond by searching for someone else's numbers. That is understandable and it mostly does not work, because settings are not a property of a material. They are a property of your entire setup interacting with that material.
We should be upfront about our position here: PrintCutCarve makes design files and owns no laser cutters. We are not going to print a settings table, because we would have to invent it. What we can give you is the method, which is the part that actually transfers between machines, and pointers to the people who do publish real numbers.
Tip
The short version: start from your machine maker's published material library, confirm focus, then run a controlled test on a matching offcut. Inspect both faces and the edges of cut tests; judge engraving for contrast and detail. Bracket a second finer grid around the winner, verify it on a real design rather than a square, and write it down.
Why borrowed numbers let you down
Two makers can run the same file on the same brand of machine and need genuinely different settings. The list of reasons is longer than most people expect.
The source. A 40 W CO2 tube, a 10 W diode module, and a 20 W fiber source do completely different things to the same wood. They are not on one scale you can convert between.
The optics. Lens focal length changes both the spot size and the depth of field. A short lens gives a tight spot that cuts thin material cleanly and struggles on thick. Dirty optics quietly cost you power over months, so a setting that worked in spring underperforms by autumn.
Air assist. Airflow clears smoke and debris out of the kerf and cools the cut edge. Different pressure, different result, on identical power and speed.
Focus. The single largest variable, and the one most often wrong. A beam focused a millimetre off the surface behaves like a much weaker laser.
The material itself. "3 mm birch plywood" is not one thing. Glue lines vary between suppliers and between batches. Moisture content varies with storage. Resin content in wood varies with the tree. Acrylic comes cast or extruded and they behave differently.
Glowforge is refreshingly direct about this in their own documentation. Their guidance on non-Proofgrade materials states plainly: "Unfortunately, we can't provide settings guidance for custom materials." A machine manufacturer with a lab declines to guess about material they did not formulate. That should tell you what to make of a random number from a forum post.
Step 0: is this material safe to laser at all?
Before settings, safety, because some materials should never go near a laser regardless of how you set it up.
PVC and anything containing vinyl chloride can produce hazardous, corrosive decomposition fumes when lasered. Some faux leathers, some vinyl flooring, and some "leatherette" fabrics are PVC. Chrome-tanned leather contains chromium compounds you do not want aerosolised. Polycarbonate discolours badly and produces unpleasant fumes. ABS melts and off-gasses rather than cutting.
Glowforge's own advice on unknown material is worth repeating: you need to know the material is laser compatible first, and "this can be tricky: you need to contact the manufacturer, inspect their safety data sheet (SDS), and/or consult an expert."
That is the correct standard. If you cannot establish what a material actually is, no test grid is going to make it safe. Ask the supplier for an SDS. Reputable ones will provide it.
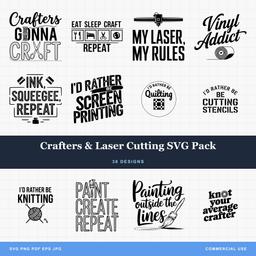 Crafters Laser Cutting Svg Pack38 designs, commercial license included$3.99
Step 1: start from a published library, not from zero
You are not trying to discover settings from first principles. You are trying to find a nearby starting point and refine it, and every major ecosystem publishes starting points.
Glowforge Proofgrade. Glowforge's own documentation describes Proofgrade materials as "specially formulated for the Glowforge 3D laser printer" giving "1-click access to perfect settings and fuss-free prints." For everything else, the app has a Manual mode where you set power, speed, lines per inch, and number of passes yourself. Their documentation notes that with thicker non-Proofgrade material, multiple passes may be needed to cut through.
xTool Creative Space. XCS ships the xTool Material EasySet Library, reachable through the More Materials button, which returns recommended settings filtered by machine model, laser power, and processing mode. It has an Official section for xTool's own consumables and a Community section of settings other users have tested and shared. The community half is the useful one for third-party material, with the usual caveat that a stranger's machine is not your machine.
LightBurn. LightBurn's material library lets you store and recall your own tested entries per material and thickness, which turns every test session you run into a permanent asset rather than a note on a scrap of paper.
The play is the same in every case: find the published entry for the material closest to yours in type and thickness, and treat it as the centre of your first test grid rather than as the answer.
Step 2: fix focus before you vary anything
Choose and confirm the focus method before comparing speed and power. Focus can itself be tested, but do that deliberately and separately from the other variables.
For surface marking, focus on the actual workpiece according to your machine’s instructions. Cutting thicker stock may require a different focus position specified by the manufacturer. Material thickness varies between sheets, boards warp, and a saved height from last week's job is a guess. If your machine has an autofocus routine, run it on this piece. If it does not, use the manual focus gauge every time.
If the material is noticeably warped, flatten or clamp it. A sheet that bows two millimetres across its width is going to cut through in the middle and not at the edges, and you will spend an hour blaming power for a hold-down problem.
Step 3: decide what to vary, and in what order
Control what changes. A one-variable strip makes comparisons simple. A two-axis speed/power grid is also useful: each row holds one variable fixed while the other changes. Keep focus, material and other settings consistent across that grid.
The software’s grid axes do not prescribe a universal order for tuning. Choose a small range around a manufacturer-supported starting point, select the variables you want to compare, and record the settings you hold constant.
| Goal | Useful comparisons | Keep recorded and controlled |
|---|---|---|
| Cutting through | Speed/power combinations, then pass count if appropriate | Material, thickness, focus and air assist |
| Engraving contrast | Speed/power combinations | Focus, interval and pass count |
| Scoring a fine line | Speed and power | Focus, line geometry and pass count |
| Photo engraving | Interval and image processing, then mark contrast | Source image, focus and material |
LightBurn’s Material Test lets you compare selected parameters in a grid. A second pass is not automatically cleaner, and maximum power is not a universal starting point. Use ranges supported for your particular machine and stock.
Step 4: build the grid
Both major software ecosystems have this built in, so you rarely need to lay out squares by hand.
LightBurn's Material Test generator lives in the Laser Tools menu. Their documentation says that by default it creates a 10x10 grid of boxes with varying power and speed, that the parameters tested can be power, speed, interval, or passes, and that frequency and Q-pulse width can also be tested on lasers that support them. Rows get labelled with the engraving speed down the left side and columns with the power level along the bottom, so the finished tile is self-documenting. Test setups can be saved as presets and reused.
xTool's Material Test Array does the same job inside XCS. Their documentation describes it as generating automatic test arrays for your design patterns, with power varying across columns on the X axis and speed varying across rows on the Y, and user-set maximum, minimum, count, and spacing. It is reached by selecting an element, then Applications, then Material Test Array. xTool positions it explicitly for material that is not in their EasySet Library.
On a Glowforge, there is no built-in generator, so you lay out a row of small shapes and assign each one manual settings by hand. Tedious, but a single row of five is quick and answers most questions.
Two practical notes on grid layout. Keep the first test compact, but make its geometry large enough to expose the issue you are studying. A small square does not reproduce the heat buildup, motion or detail of every larger design. And put the grid on the offcut, the corner, or the piece of the sheet that already had a flaw. The whole point of this exercise is that it costs you scrap rather than stock.
Step 5: read the result properly
This is where most test grids get wasted, because people look at the top of the sheet and stop.
For cuts, inspect both faces and the edge after processing is complete. The back helps reveal incomplete cuts; the front can show scorching and damage. Check whether the tile releases gently without forcing or breaking it. The lowest-energy tile that releases without force is your candidate, not the one that looks most dramatic.
Look at the edge quality, not just whether it separated. A cut that went through with excessive energy leaves a wide, sooty, tapered edge and a burn halo on the surface around the kerf. A cut that just made it through leaves a narrow, evenly coloured edge. Choose a repeatable cut with acceptable edge quality, then verify it on the actual design. Do not assume a gentler tile will still cut through.
Check the taper. Hold a cut piece up and look at the edge from the side. Heavy taper, where the top of the kerf is much wider than the bottom, points at focus being off or at needing a slower pass rather than more power.
For engraving, look at it in raking light and from arm's length. Contrast that looks great at 10 cm often disappears at normal viewing distance, and detail that looks fine straight down turns out to be scorched when you tilt the piece. Both matter for a finished product.
Watch for these specific failures:
| What you see | Usual cause |
|---|---|
| Cut through in the middle, not at the edges | Warped material or bed not level, not settings |
| Wide sooty edge with a burn halo | Too much energy, or air assist too weak |
| Cut fails only on tight curves and corners | Check motion-related power control, focus and geometry |
| Engraving looks banded or striped | Check interval, scan alignment and mechanical motion |
| Random patches that will not cut through | Glue line in plywood, or a knot |
| Everything is weaker than last month | Dirty lens or mirrors, or an ageing tube |
That fifth row deserves emphasis. Plywood is a lottery. A void or a heavy glue line in one part of a sheet can stop a cut that succeeded 20 mm away, and no setting change fixes it. If a grid gives inconsistent results across identical tiles, suspect the material before you suspect the machine.
Step 6: bracket a second, finer grid
Your first grid is a coarse scan. It tells you roughly where the answer lives. The second grid is where you actually find it.
Take the winning tile and build a small grid centred on it with much smaller steps, three or four values each way instead of ten. This is a two-minute job on a scrap corner and it converts "somewhere in this range" into a number you can save.
If the coarse grid's winner sat right at the edge of the range, extend the range rather than accepting the edge. A boundary result may justify another range within the manufacturer’s limits; it does not prove that more power or slower speed is appropriate.
Step 7: verify on a real design, not on a square
Here is the step almost everyone skips, and it is the one closest to what we actually know about.
A test square is the easiest thing a laser will ever cut. It is four long straight lines with four corners, run at constant velocity for most of their length. Your design is not that. Real artwork has tight radii, small interior cutouts, sharp corners, and closely spaced parallel lines.
Those features change the physics. On a tight curve or an acute corner, the head decelerates to change direction, which can change energy per millimetre unless the controller adjusts power with speed. That is why a setting that cuts a 40 mm square perfectly can scorch a 2 mm radius on an antler tip or blow through a fine interior detail.
So before committing a sheet, cut one real element from your actual design at final size on the scrap corner. A single tree, one mountain outline, one small interior cutout. It costs 30 seconds and it catches the corner-burn problem that squares never reveal.
This is also why design geometry and settings are not separable questions. If your verification piece keeps burning at the tight spots, the answer may be a slightly bolder design rather than another settings pass. Our guide on how much SVG detail survives at small sizes covers where that line sits.
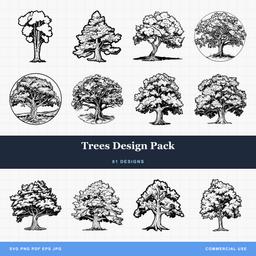 Trees Design Pack81 designs, commercial license included$3.99
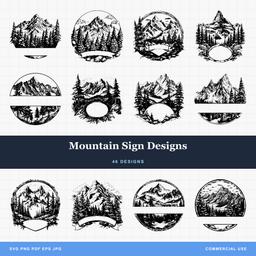 Mountain Sign Designs46 designs, commercial license included$3.99
Step 8: write it down, properly
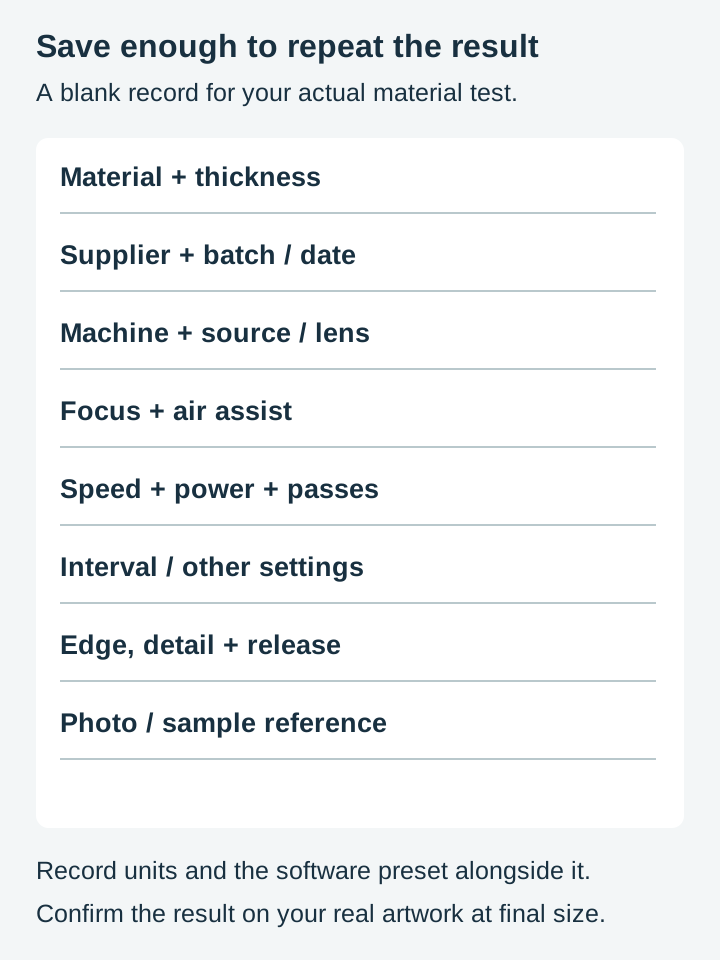
A dialed-in setting you cannot reproduce is a setting you will have to find again. Record more than the numbers.
- Material type, thickness, and supplier
- Batch or purchase date
- Machine, lens, and air assist configuration
- Focus method used
- The settings themselves, and how many passes
- A photo of the finished edge
LightBurn's material library is built for exactly this and keeps the entry attached to the software you actually work in. If you use a different tool, a spreadsheet works fine. Supplier and batch date are the fields people leave out and later wish they had, because when a material suddenly stops behaving, the supplier change is usually the reason.
When to retest
Settings drift. A confirmation strip, a single row of three or four tiles on a scrap corner, takes under a minute and is worth running whenever any of these change:
- New supplier, or a new batch from the same supplier
- A different lens, or optics that have just been cleaned
- Modified or repaired air assist
- A CO2 tube that has been in service a long time
- A big change in workshop temperature or humidity, which affects wood in particular
None of these are dramatic on their own. Together they are why the settings that worked six months ago produce a half-cut sheet today.
Material quirks worth knowing before you test
Not settings, just the behaviour that makes each material's test grid read the way it does.
Plywood is the least consistent common material because of glue lines and voids. Test on the same sheet you plan to cut, not a different sheet of the same product.
MDF cuts consistently and stinks doing it. The edge goes very dark, which some people want and some do not.
Acrylic comes cast or extruded. Cast engraves to a frosty white and is generally the one people want for engraved work. Extruded is cheaper and behaves differently under the same settings. Check which you bought. Our acrylic laser cutting and engraving guide goes into the differences properly.
Coated and anodised metals are a marking job rather than a cutting job, and the coating, not the metal, determines the result.
Slate and stone fracture rather than burn, so contrast depends heavily on the stone itself. Two batches from the same supplier can behave completely differently, which makes the test grid mandatory rather than optional.
Veg-tanned leather lasers well. Chrome-tanned does not belong in a laser. If the supplier cannot tell you which it is, do not risk it.
For a wider view of how each of these behaves, our best materials for laser engraving guide is the companion piece to this one.
Designs that give you something worth testing on
Every pack on PrintCutCarve is $3.99 and ships as SVG, PNG, JPG, PDF, and EPS, with a commercial license included at no extra cost. There is no unit cap on physical products you make and sell, and print-on-demand platforms are permitted as well. The only thing you cannot do is resell or redistribute the digital file itself.
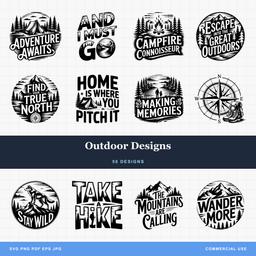
The Crafters Laser Cutting SVG Pack is built around clean closed paths at sensible weights, which makes it a fair verification piece: bold enough that a good setting cuts it cleanly, detailed enough that a bad one shows you immediately. The packs below are the ones worth having on the scrap corner while you dial a new sheet in.
Designs for this project
Frequently Asked Questions
Why can't you just publish laser settings for each material?
Because settings are not a property of the material, they are a property of the whole system. Wattage, laser type, lens, air assist, focus height, and the specific batch of material all change the answer, and two identical machines will diverge on two batches of plywood. PrintCutCarve is a design shop with no machines, so any number we printed would be invented. The method below transfers between machines in a way that numbers never do.
Where should I get starting numbers from?
Your machine manufacturer's own material library. Glowforge ships one-click settings for its Proofgrade materials, xTool has the Material EasySet Library inside xTool Creative Space with both official and community-contributed entries, and LightBurn lets you build and share material libraries of your own. Start from the closest published entry for a similar material and thickness, then bracket around it with a test grid.
What should I change first when a test cut fails?
Check focus, material compatibility, optics and the setup first. Then vary a controlled setting range. A one-variable strip isolates that variable; a two-axis grid compares combinations while holding the remaining settings fixed. Follow your machine’s guidance on which ranges to test.
How often do I need to retest a material I have already dialed in?
Whenever something in the system changes. A new supplier, a new batch from the same supplier, a lens change, cleaned or dirty optics, a modified air assist, or a tube that has aged all shift the result. A quick single-row confirmation strip on a scrap corner takes a minute and catches drift before it ruins a full sheet.
Can I sell what I make with your designs?
Yes. Every pack is $3.99 and includes a commercial license, with no cap on the number of physical products you make and sell. Print-on-demand production is permitted too. The main restriction is that you cannot resell or share the digital file itself. Full terms are on our [license page](/license).